
We’ve reached the final two steps of my Troubleshooting Cheat Sheet (totally new tips/topics will follow, I promise).
Thanks to Rob C. and Anthony D. for your blog comments on last week’s subject: “Compatibility of Primers and Pigmented Topcoats”.
Today, let’s talk about Step 4: Managing the Drying and Curing of Finished Parts.
As finishers we tend to stress over the fine details of surface preparation and the minutia of spray gun setups and use.
Yes, these two focus points are critical in obtaining a high-quality finish – but what happens to your newly sprayed piece after the coating has been applied and is ready to be moved out of the spray booth or finishing room?
This is now what we need to focus on and how the drying and curing stage of the finishing process takes place. Let’s break this down into three stages of the process.

Stage 1: Wet Parts Handling
OK, so you are all dialed-in and have been applying the final coats of the waterborne finish of your choice.
The last coat–i.e. the “money coat” is coming off the gun– is laying-down beautifully– success is minutes away.
At this step, you will let the solvents flash-off and allow the coating to begin the self-leveling process. This part for the wet-film application is called the “dwell time”.
Depending on the type of finish you are using, this process can take anywhere from 5-10 minutes (remember – we are talking WB’s here, not high-VOC nitro’s…), and this timing will vary based on your wet film thickness at the time of application.
Once the coating begins to off-gas and de-air you will see the coating start to shrink into the lower film formation.
At this point the film is becoming tacky to the touch and any air and wobble that is visible in the wet coat is beginning to level off and dive into the lower coats and substrate.
In most well-thought-out spray rooms, the wet part is moved to a drying rack that is a short distance away from the spray booth. This is where the early wet film can do its thing without being contaminated by over-spray from the on-going booth applications.
Dust control is mandatory at this early stage of the film formation. I cannot stress enough that this is where you must keep any and all ambient pollutants out of the wet coat.
Stage 2: Dry-to-Touch Handling & Storage
Once the initial off-gas and early film formation has begun, and you can see that the film is becoming tack-free, you can now move the newly finished “green” parts to a separate drying area. This area needs to be as dust-free as possible and have good temperature controls.
It is also a good idea to have low-speed air movement flowing across the parts now that they are in the film-shrink stage. Warm air movement, slowly flowing across the finished parts, allows for a more even film formation.
At this stage the smaller defects, i.e. micro-nubs, over-lap and film wobble will continue to level into itself and melt into the previously applied coat. Did I say “melt?!” – yes, we will get to film melting and burn-in later – it’s a subject all unto itself.
So, in Stage 2 we now see the film formation take place as a dry coat forms and settles into its final look. This is where solvents continue to off-gas and the sheen/gloss level begins to develop.
Flatting agents used to lower the gloss reading will begin to level-off inside of the film and align into matching particles higher up in the film formation.
In gloss formats, the solvent release allows the resins to develop into a higher gloss level that is formulated into the resin structure. This is a critical stage because the film is still very tender, i.e. “green” and can be easily damaged and sheen levels can get offset.
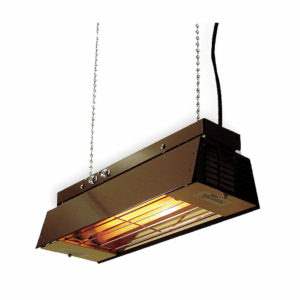
This is still part of the drying-stage and can take upwards of 12-18 hours to complete depending on the ambient conditions and the type of coating you are using. This timeframe can be accelerated by introducing penetrating IR (Infra-Red) or radiant heat into the process.
There are several options here for you to consider, but regardless of how you introduce warmth into the pre-cure stage, it is important to keep the air temperatures at a range that is set within the manufacturer’s guidelines. I recommend temperatures ranging from 70°-110°F for all EMTECH topcoats.
Stage 3: Early Dry-Parts Handling and Make-Ready
Once the finished parts are dry to the touch the early-cure stage begins. As mentioned, in most cases we can predict good protective qualities after the 12-18 hour ambient dry-time if we can keep the passing-air temperatures within the range recommended by the coatings formulator.
This is when you can begin to carefully handle the parts for installation, or make-ready for packaging and shipment. Keep in mind, that although the film is dry-to-touch, it is far from full chemical cure. Most ambient-cured waterborne coatings take upwards of 100+ hours to obtain their desired film hardness and chemical resistance.
Note* — Coats that have a catalyst or crosslinking function can be deemed fully cured in a matter of hours, not days, so you need to qualify this with your supplier.
As I mentioned above, “drying and curing” may not be the sexiest topic when it comes to wood finishing, but doing it right can dramatically improve your results.
Stay tuned and watch your inbox for the final step of my troubleshooting cheat sheet.
Until then, do you have any experiences, advice or questions about drying and curing?
Please share your thoughts or read what others are saying in the comments section below.

We make “finger boards” which is a scrap piece of plywood with screws through it and it supports the work. One the item is finished, we pick up the finger board and place it on the drying rack, which is plywood with nails through it. Once the item is dry we take it away from the smaller finger board and place it on the large rack. The next day we sand and finish again.
Frank — Horizontal has always been mu best way to finish. Hanging items is a good way to go for volume shops and run/sag control has to be taken into consideration. Everyone has their “go to” method!..
Much obliged — JW —