Okay. I get it. Wood finish shading is a special effect you won’t want to use on every project.
But when you’re looking to add a bit of pizazz and punch to a piece, it can be a real game changer.
I have a hunch that once you’ve read through this article and realize just how easy it is to master the basics, you’ll want to try it out.
And you may even decide to add wood finish shading to your repertoire. It’s that exciting.
BACKGROUND
Wood finish shading is done using a thinned finish that has had color added to it.
The colorant can be either a dye, a pigment, or a mixture of both.
And if you selectively tone only one area of a surface – such as the sunburst effect on a guitar face or the edges of a raised panel – it’s called shading.
Let’s get at it.
STEP 1: SEAL THE SURFACE
First off, shading is so exciting that it can easily stand by itself in making a dramatic statement.
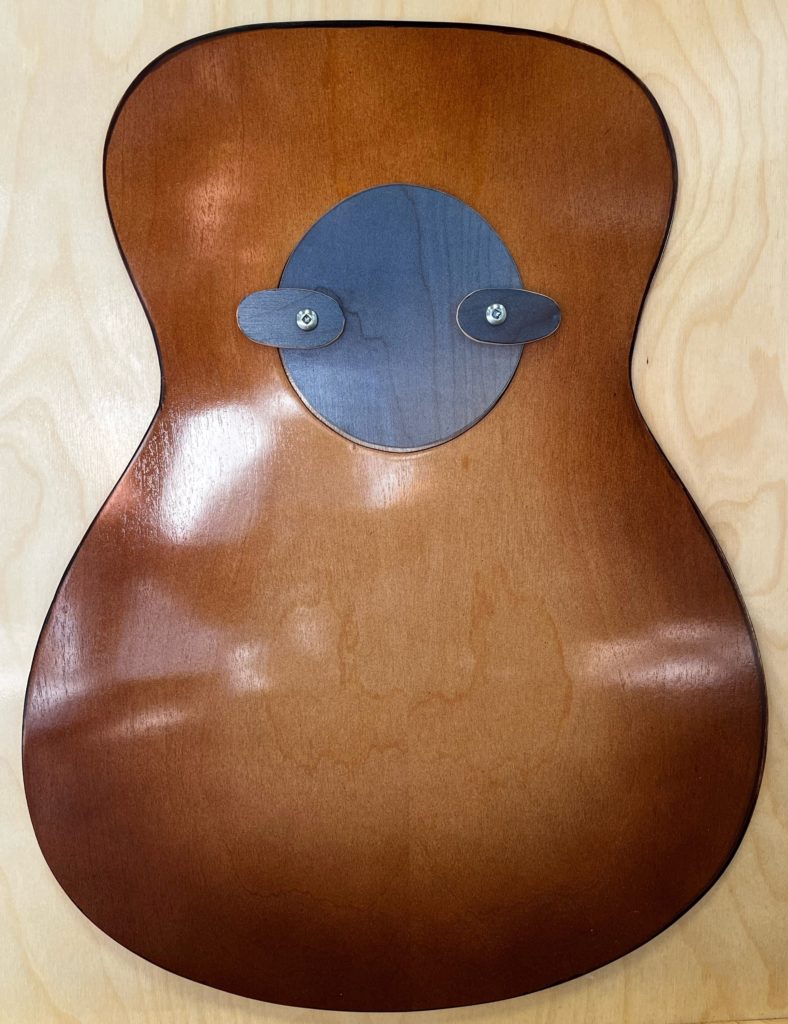
So much so that it’s widely used to create those beautiful sunburst finishes seen on guitars (see the sample piece in the above photo).
You should also know that shading can be applied as one of the final steps to a complex, multi-step finishing process that includes pore filling, coloring and staining or glazing.
So whether you’re wanting to use it as one of a multi-step process or by itself as described in this article, you’ll want to completely seal the wood before going any further.
And this is so important – especially when you’re first learning this effect – because if you’re not happy with how it’s going, it’ll come off that much easier and keep you from having to go all the way back to bare wood and start over again.
All you’ll need is two coats of sanding sealer, sanding after each. I like to use foam-backed sandpaper because it conforms better to edges or profiles and is therefore less likely to cause sand-throughs.
Your second coat should need nothing more a light swipe of the sandpaper. Ensure you vacuum away or blow off any sanding residue. Let’s move along to our next step.
STEP 2: PREPARE YOUR SHADING FINISH
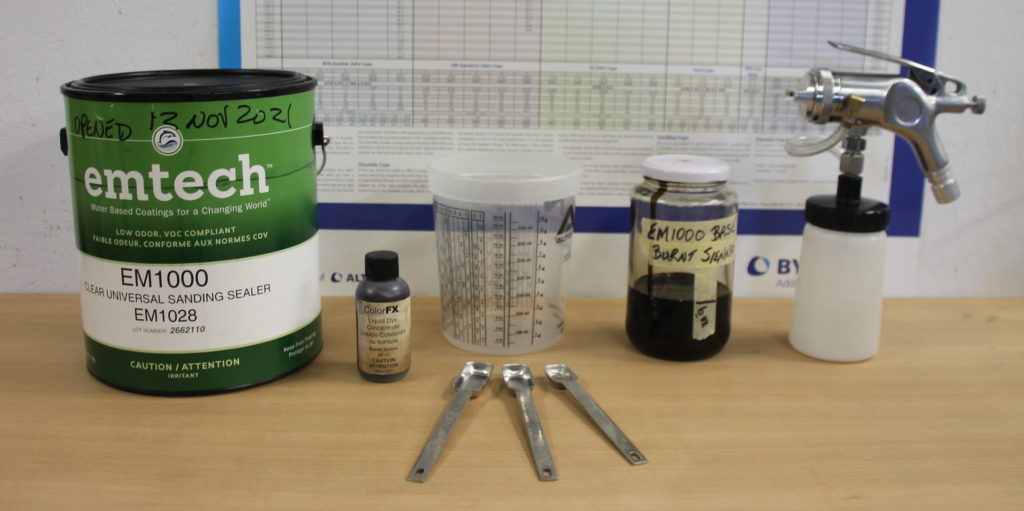
I mix my own water based, 3-part shading finish in the following proportions, by volume:
65% sanding sealer
30% tap water
~5% concentrated liquid dye (more or less depending on the desired color/hue)
I prefer using Target Coatings sanding sealer because it’s very clear (rather than white like other manufacturers’ products) which enables me to more readily get the exact color I’m aiming for.
If you’d prefer to use shellac or a top coat rather than sanding sealer as the base, that will work too. Just make sure your thinner and dye are compatible with it.
Pro Tip: To duplicate the same shading finish at some future time, write down the exact proportions you settled on. And while you’re at it, document all the other pertinent finishing information associated with that job: surface prep; specifics of finishing products and equipment used, as well as the finishing schedule. That’s what the pros do.
That’s it for Part 1, but stay tuned for Part 2 in which I’ll discuss setting up your spray equipment, spraying technique, and a few other things I’ve learned about wood finish shading.
In the meantime, do you have any questions about or personal experiences with wood finish shading? Please share your thoughts or read what others are saying in the comments section below.

I love it! Great job and thanks for sharing your thoughts on this subject. I found your products on the Stewart McDonald site and just bought my first setup of products from you to do exactly what you have done here. I look forward to seeing the next segment and giving it a try myself soon.
One Quick question if I may. In order to progressively get a darker shading, are you adding more tint to the solution to darken it as you go or just applying more coats with the same concentration of tint towards the outer edges to get the darker color?
Thanks again for the Pro tips!
Hey Terry, I’m glad you’re interested in trying your hand at shading.
As regards more tint or more coats to achieve a darker shade, the simple answer is “either”, as it really depends on how close you are to achieving your desired effect. I always recommend doing a test sample on a scrap piece before working with the actual piece. That time-proven practice will allow you to confirm whether your solution is in the ballpark and ready to go, or if it’s off and requires adjusting. It will also tell you approximately how many coats you’ll need. Remember my advice to “build the finish up slowly by applying very light coats”, which is how I did it in the second segment’s video.
Let me know how things work out for you, and thanks for your question, Terry.
Marty
Hi Marty,
the only part I’m wondering about is where do you get the concentrated liquid dye?
Justin – There are several ways one may purchase these dyes through Amazon, directly from Homestead, or luthier supply houses such as Stew Mac.
-Marty-
Do you have any favorite brands – like transtint, mixol, etc.?
Garrett — Both the TransTint line from Homestead Finishing Products and the Mixol brand are excellent colorants. You can purchase both from Homestead.
-JeffW-