With the right tools and a systematic approach to buffing and polishing water based finishes, you can get that gleaming finish of your dreams.
Speaking of tools, here is what you’ll need:
What You’ll Need
- Wet/dry sandpaper in grits 220 and 320
- Automotive-style polishing pads in grits 500, 1000, 2000, and 5000
- Buffing pad, suitable for mounting on polisher, or variable-speed, random orbit sander
- Buffing compound, available at most automotive supply houses
As with all fine finishes, preparation is key. You simply cannot achieve a deep shine buffing and polishing water based finishes without the underlying surface being smooth and completely free of surface glue.
So, in Part 1 of this post, we’ll talk about preparing the surface, adding a topcoat, and then polishing it. In Part 2, we’ll cover buffing and waxing.
Ok, let’s jump into the surface prep…
You have two tools to select from: a well-tuned scraper or sandpaper.
If you sand, you need to progressively work your way to P320 grit before the wood is ready to accept your finish.
That is, unless you’re planning to stain the wood before applying the topcoat, in which case you need to stop at 180 grit. Anything finer than that and the ability of the stain to effectively color the wood is going to be limited. Then, ensure the stain is fully dry – at least overnight – before applying the sealer, followed by the topcoat of your choice.
My final guidance on sanding is this: when sanding with machinery, regardless of whether you’re staining, always do a final hand-sanding with the grain to ensure there’ll be no sanding swirls to contend with.
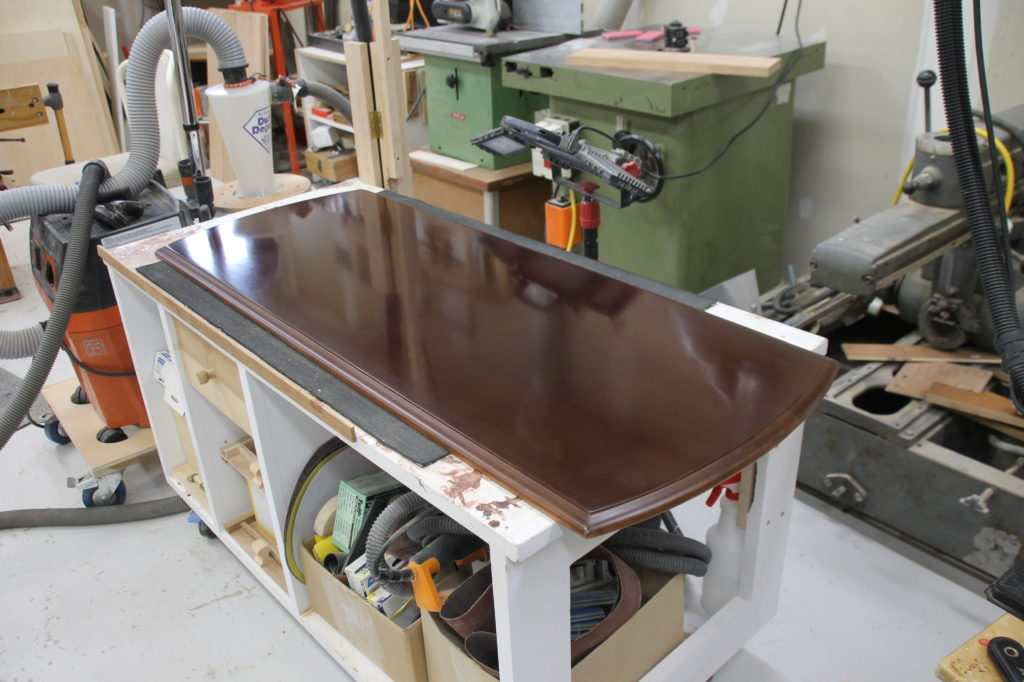
The Correct Topcoat
You can’t achieve your desired mirror-like finish with an oiled or waxed surface.
What is called for here is a film-forming finish that dries hard: lacquer or urethane or even shellac. And of those, the ones that leave no witness lines (those telltale lines left as polishing cuts through successive finish layers) are best.
You’ll hear terms such as “burn-in” bandied about by suppliers and finish manufacturers to describe finishes whose successive layers bond together to form one unified thicker layer.
To be perfectly honest, I’ve had very few finishes show witness lines, and of those that did, I believe it had more to do with having waited beyond the manufacturer’s recommended waiting time between coats than the finish’s lack of burn-in characteristics.
Polyurethanes are most particular in this regard; don’t wait until you need to sand between coats but reapply the next coat as soon as the manufacturer indicates you may proceed, as long as the previous coat really is dry.
You need to apply enough coats to ensure there is enough finish for the polishing and buffing stages to work with, and if you’re dealing with a porous wood like oak you will have to fill the grain beforehand.
Before you start the buffing process, the surface must be smooth. Very smooth.
As you’ll find out, the buffing process removes a certain amount of finish; if there’s not enough, you’ll go through the finish to the bare wood and have to start all over again.
As is the case with virtually all finishes, several thin coats are preferable to fewer thick coats. Because thicker coats require more time to dry, more airborne dust will settle on their drying surface.
Those minute dust “nibs” need to be cut down before you move onto applying successive layers of finish, so deal with them once they are dry by using sandpaper one grit level finer than what had been used on the bare wood.
Better yet, deal with dust “nibs” by heeding my advice about applying thin coats – “an ounce of prevention is worth a pound of cure” – and there should be almost none to deal with.
Allow your topcoat to cure for a few days; a full week or more is even better or else the finish will be still too soft to take an effective sheen.
Water Based or Oil-Based Topcoat?
I may as well deal with this question right away, as more and more woodworkers – like myself – are turning to water based finishes.
The fact of the matter is, I have had equal luck buffing and polishing water based finishes and oil-based topcoats alike, and the application of them is similar.
So, your choice of one over the other needs to be based on other factors we have previously talked about (see “objectives” here.)
Once you’ve selected your topcoat, go ahead and apply it using spray, brush or rag depending on the manufacturer’s recommendations and what you feel most comfortable with.
If brushes are your applicator of choice and you’re applying a water based topcoat, I’ve found that going over the area one last time with a slightly finish-dampened (not fully wet) foam brush removes any trace of bristle brush marks.
Dealing with Finishing Errors
You can’t expect your finish to take on a piano-like shine if you’ve got drips and runs all over the place.
If you have any, then cut them off using a sharp chisel or take out your trusty scraper and scrape them off, being careful not to take off any more finish than is absolutely necessary.
If you find there are several to deal with, you’ll probably need to apply another final topcoat before proceeding with the polishing.
Proper Polishing – From Coarse to Fine
At its simplest level, polishing is merely sanding with progressively finer abrasives.
My polishing system calls for dry, water-free products and I am especially impressed with the Abralon sanding pads from Mirka.
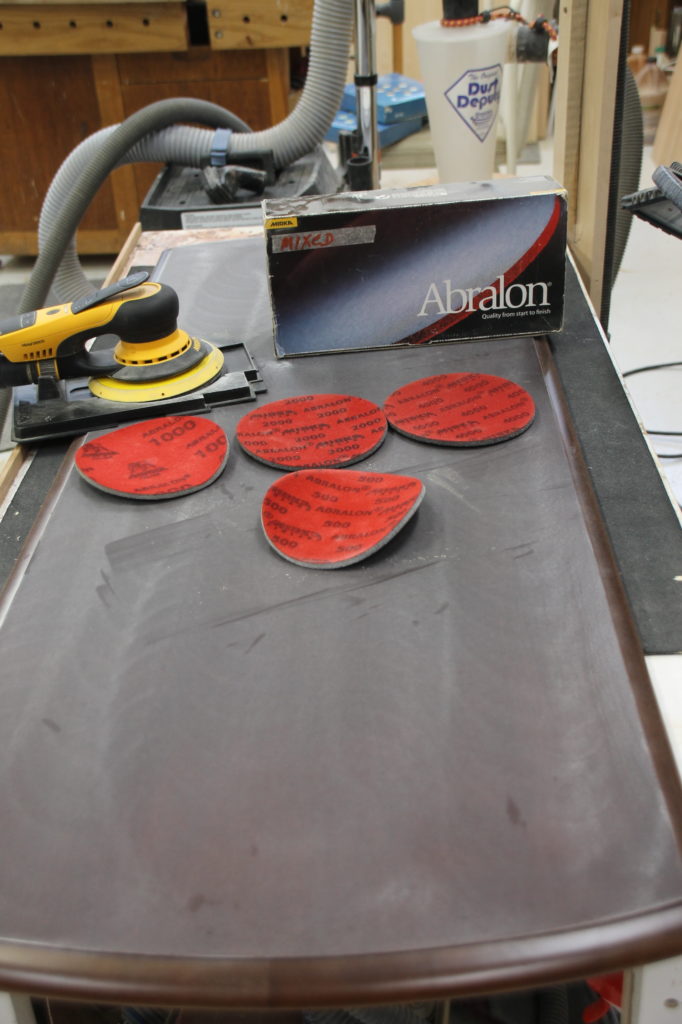
Mount a 1000-grit polishing pad on your sander or polisher and set the speed to low and turn your machine on before touching down on the surface.
Start your first pass at the left end, bottom corner and work your way to the right, keeping the machine moving at all times.
When you get there, continue moving your machine to the next row, overlapping the first by approximately 50 percent, then work your way back to the left end. Continue this way until you’ve covered the entire surface.
Depending on the machine, you may wish to increase the speed to medium. Be especially careful at the edges and ensure you keep the machine level or you may cut through the finish.
Don’t be too particular about getting rid of all swirl marks at this stage unless they’re pronounced, in which case you may need to go over the area of concern a second time.
Vacuum the entire surface, being careful not to scratch the surface with the wand; using a brush attachment helps in this regard (see below).

If you find that the 1000-grit wasn’t coarse enough to level the top, you may elect to do your second pass using a 500-grit pad and then move back to 1000-grit. The objective here is to establish a completely smooth surface.
Polishing the Edge Profile
If it’s a chamfer or square edge, depending on your experience and level of control over your machine, you should be able to do this and all successive polishing with your machine.
However, if the profile has a radius to it, you’ll need to make a custom-shaped sanding block that matches the profile (see below) so you can polish with this and successively finer grits, by hand.
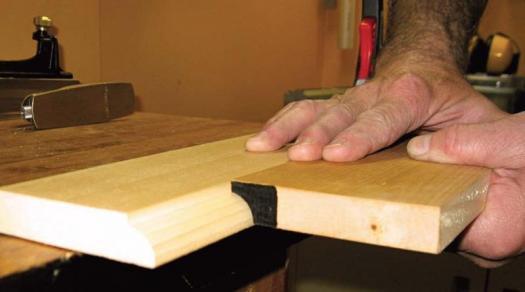
To help contour the abrasive surface to the wooden edge profile, you may want to use a piece of thin cloth or paper towel between the abrasive paper and the block.
As with any machine polishing, hand polishing calls for careful attention and a steady hand; move the block only with the grain and check your progress frequently. Stop as soon as the finish feels the same on the edge as it does on the flat surface.
Once you’re happy with the 1000-grit polished surface, replace the polishing pad with the 2000-grit pad and go over the entire surface, then again deal with the edging as before. Repeat this process through the 5000-grit pad and you should be seeing reflections showing.
That’s it for Part 1.
Keep an eye out for Part 2 in which we’ll cover Buffing and Waxing.
In the meantime, if you have any questions or experiences buffing and polishing water based finishes, please share them in the comments section below and I’ll respond to as many as I can.

a couple of quick questions
1) you mention applying topcoat in thin coats – is there a general number of wet mils you should lay down for each coat?
2) you also mention you need to apply enough of a top coat finish for the buffing and polishing stages to work with – is there a general number of dry mils you should achieve?
thanks for sharing your knowledge
Greg –
The average wet film thickness for all of our clear coats, i.e. lacquers, varnishes and urethane is 2-3 mils wet per coat.
Different polishing processes require different final dry film thickness of these finishes based on solids content and the substrate that the coating of choice is being applied over. With this said I like to see an average 2.0 – 2.5mils of cured film formation before I start any pre-polish or final polishing procedures.
-JeffW-
This was very helpful. Thanks!