How to Get the Ultimate Furniture Finish – Part 1. By Marty Schlosser
There’s no denying the key role finishing plays in any successful piece of furniture or set of cabinets.
Even an exciting design, meticulously crafted with the most appropriate materials will fall flat if the furniture finish is poorly conceived and executed.
The opposite is also true: a poorly designed and crafted piece of furniture can’t be saved by an amazing finish. Sure, it’ll bring it up a notch or two, but it’ll still be a “sow’s ear.”
In this article I will share with you my seven pro tips which will help you consistently achieve that ultimate furniture finish your work deserves.
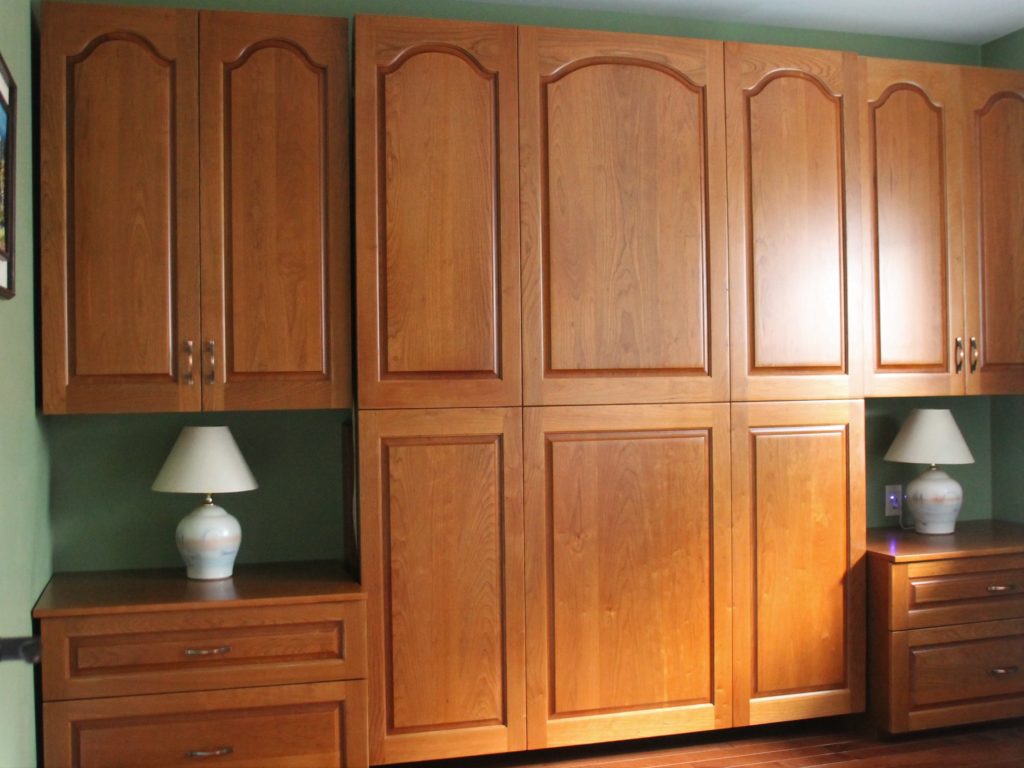
And to better explain the more complicated tips, I’ll use as an example my most recent project: my spouse’s craft room with its Murphy bed and cabinetry allowing it to act as a spare guest bedroom.
This is a big project, and no doubt it will take more than a brief explanation as to how I approached and completed the finishing schedule for it.
Therefore, we are going break this blog post into two parts. Here are the first three tips on getting the ultimate furniture finish…
Pro Tip #1: Understanding Objectives
To be most successful your finish needs to dovetail with the objectives the designer and maker had envisioned. To understand those objectives, ask yourself such things as:
“What purpose will the item serve?”
“What environment (indoors/outdoors/day-to-day use/kitchen…) will it be used in?”
“What appearance (color, sheen, texture…) is envisioned?
Once you have a firm grip on the objectives, you’ll be able to proceed.
Example Project – Objectives: The upper and base cabinets would see daily use, so the finish had to be durable – most especially the tops of the two side tables.
My spouse wanted the cabinetry finished to blend in with the room’s elegant green walls and medium-brown stained maple floors. She also wanted them to be similar in appearance to the furniture and cabinetry throughout the rest of our home: aged cherry finish in a medium sheen. I certainly had my work cut out!
Pro Tip #2: Selecting Finishing Materials & Equipment
Now is the time to gather the materials and equipment you’ll need to apply the finish.
To help you better understand the various furniture finishes and their uses, Target Coatings has an excellent product specifications webpage which I would highly recommend you refer to when selecting finishing materials.
As well, one book which I have found especially helpful for those just getting into finishing is Bob Flexner’s “Understanding Wood Finishing.”
Ensure you understand the characteristics of the wood(s) and other materials your project is made from and take them into consideration when selecting finishing materials.
It’s easy to overlook such things as the need for using filler to seal the open pores of heavily grained woods such as oak and mahogany.
Although knowing what finishing products to apply and developing a sound finishing schedule (i.e. what order to follow, including sanding grits and when to use them) are essential, you still need to be fully familiar with the equipment you’ll need to apply them.
And don’t forget about safety: your lungs deserve the protection an approved respirator provides.
Finally, once you’re selected the finishing products, take the time to confirm that they’re still good.
Most finish manufacturers stamp their containers with a batch number, which your supplier can use to find out how old it is. And because I always print the date, I open a new tin of finish, right on the tin, I can use that as an good indicator of its condition.
As a rule, if it’s 3 years or older, I will automatically assume it needs to be replaced.
Example Project – Finishing Products Chosen: Because the cabinet doors, drawer fronts and side tabletops of my project were solid cherry – a wood species known to blotch when stained – prior to staining I had to first seal the wood to allow even penetration of the stain.
For this I used Target Coatings NR4028 Clear Base, thinned 50/50 with tap water.
For stain, I selected Target Coatings NR41728 Cherry Toner.
Then, to lock in the stain, I chose Target Coatings EM1000 sanding-sealer, which I followed up with two different topcoats.
I used Target Coatings EM2000 water based alkyd varnish for the vertical surfaces, as I knew it would give those surfaces the look and feel my client (you know, she who must be obeyed…) wanted.
For the tabletops, which usually receive more wear and tear than doors and drawers, I chose their EM8000 conversion varnish, reinforced with CL100 cross linker.
From experience I know that particular varnish will deliver the look and feel I needed.
Example Project – Finishing Schedule & Application Equipment:
* Machine sand all surfaces to P180 (starting at P80), vacuuming off sanding dust between grits if your sander is not vacuum equipped. Hand sand all end grain sections to P220. Ensure all sanding dust and sanding grit has been removed by either compressed air or vacuum. Do not, repeat, do not use a tack cloth as the solvents therein will contaminate the surface and lead to fisheye and other problems.
* Reduce the stain base by 50% with water, then spray a 2 mil thick coat. I used my Fuji Spray LX-20 compressed air spray gun, with a 1.0mm needle/nozzle/air cap set.
* 10 minutes later I applied the first of two coats of stain with my Fuji Spray LX-20 compressed air powered spray gun, with a 1.4mm needle/nozzle/air cap set.
* 1 hour later I applied the last coat of stain and allowed it to set overnight.
* Using my Q5 Platinum turbine system with its T75G spray gun (with a 1.0mm needle/nozzle/air cap set), I applied two, 3mm coats of sanding-sealer. Do not sand between coats.
* Sand everything with P400 grit, being especially careful at edges to ensure you don’t sand through the stain. I use my random orbit sander for all flat surfaces; for raised panel sections I hand sand with a sanding sponge pad.
* Apply 3 coats of topcoat with my Q5 Platinum turbine system with its T75G spray gun (1.3mm needle/nozzle/air cap set). Respect the mixing instructions for the conversion varnish and cross linker. Unless problems are encountered no sanding is required.
Pro Tip #3: Preparation
The role of sound construction (e.g., limiting & addressing glue squeeze-out, dealing with clamping dents) techniques and surface preparation prior to applying finish simply cannot be understated.
Yes, I know from personal experience how arduous preparation can be but believe me when I say that doing this work correctly will save you many hours of headache down the line. Here are some details to consider:
A. Surface preparation. Some finishers prefer to use hand plane and scrapers in lieu of, or in concert with machine and/or hand sanding. The fact is that it really doesn’t matter which method you use, as long as the surface is properly smoothed, and any sanding dust and grit removed. I usually caution against sanding above P180 if your finishing schedule calls for staining… although there are some products that require a different protocol, so ensure you familiarize yourself with them before proceeding.

B. Prepare your spray finishing equipment. Pros know the importance of this step, and you should, too if you wish to get consistently excellent results. Always start with a clean and properly lubed spray gun and ensure your air compressor/turbine filters are clean and if necessary, replaced.
C. Know the ins and outs of your spray finishing equipment for use with the various finishing products you’ll be applying. Don’t assume that just because you’ve sprayed solvent based lacquer in the past with your favorite gun that the same needle/nozzle/air cap set will suffice for the water based conversion varnish you’ve selected for your project.
D. Set an Environment for Success:
- Prepare Spray Finishing Area (Booth exhaust and intake filters clean, your spray stands ready to go and your lighting set working well.
- Prepare Drying Area (have your drying racks at the ready, along with any carts or rolling support systems needed to move heavy/awkward/bulky pieces between the spray booth and drying area)
- Proper Mindset. You’d be surprised how important this latter point is! As well, ensure you have set aside the necessary amount of time to get the job done properly. Factor in some additional “gremlin busting” time.
We’ll conclude with Marty’s post in Part 2. Stay tuned!
Until then, any comments or questions regarding Marty’s above approach? Please share your thoughts or read what others are saying below in the comments section.
Marty Schlosser is a Contributing Consultant to the Target Coatings Blog. Marty lives in Ontario, Canada

I have traditionally gone with one coat of sanding sealer in the past but would like to try two with one light sanding! Thanks so much for the article looking forward to reading part two.
When applying sanding sealer over stain, I’ve found from experience that two coats are necessary to mitigate the possibility of sanding through the stain to bare wood. Glad that you liked the first part!
Marty S.
Excellent article and timely for me. I’m considering refinishing my cherry kitchen cabinets. I’m curious why Marty used a compressed air gun for the base coat and the stain but then switched to a compressed air gun for the rest of the finishes.
Great question as to why I used two different spray guns on this project, Ken. I chose to work with my LX-20 (compressor HVLP gun) for the base and stain coats because they’re medium-viscosity finishes, and that’s an area where HVLP guns shine. Then, because I was working on another project at the same time which needed the same stain, I kept the LX-20 loaded with the stain and turned to my T75G (turbine HVLP gun) for the sealer and topcoats. It was simply a question of efficiency.
But now that we’re talking about gun choice, here’s some additional info for you. Had I elected to spray a extremely high-viscosity topcoat finish in lieu of the EM8000 (which is a mid-viscosity finish), I would have most likely used one of my mid-pressure guns instead of the T75G… but I’d still have kept the LX-20 for the base and stain coats for the reason already given.
Again, thanks for asking for that clarification. Please let us know how things go with your kitchen refinishing project.
Marty S.
Thanks for the detailed answer regarding guns. For those of us who do this as a hobby and not a business, can you suggest a “one size fits all ” gun setup? I tend to use a variety of finishes on my projects and realize that there isn’t a gun that handles everything but is there one that comes close?
My recommendation would be the LX-20, assuming your air compressor can provide the needed cubic feet per minute (CFM) volume of air to keep up with the gun. It is worth noting the comment from one respondent to my article “Key Factors when Choosing an Air Compressor for your Wood Finishing Spray Gun“, who suggested that for hobbiests, the air volume could be adequately satisfied by a compressor capable of generating 7.1 CFM @ 90 psi. Then, if for whatever reason you wish to forego compressed-air guns, the turbine-based T-Model series spray guns, mated to at least a 4-stage turbine, would be my recommendation. Hope this helps you out with your decision, Ken.
Hi Marty,
Just to be clear, you only sand after applying the sealer (just before the topcoat application)? I would have thought your initial 2 mil application of base stain would have raised the grain and required you to do some sanding early on. Also, how long do toy have to wait between coats of the full strength sealer?
Thanks for the help.
Bill, that’s a great question, as when and how much sanding I needed to do was something I used to grapple with. You’re correct in stating that the base stain will indeed raise the grain. But if you sand at that point, the effectiveness of your stain conditioning will be lost. And you don’t also want to sand the stain coat(s), as there is such a great likelihood of sanding through the stain. That’s why you wait until both coats of the sealer are down and ready for sanding before doing so.
Regarding the time needed to have the 1st coat of sealer dry enough to accept the second coat, depending on conditions (air temperature and dryness) I usually wait between 45 minutes to an hour. If you sense that the sealer hasn’t yet dried to the touch (check it in the least observable area), give it another 10 minutes, then check it again. You can also help speed up the drying a bit after the first 30 minutes, by using a fan set to a medium speed.
Hope this helps answer your questions, Bill and once again, thanks for asking them. I usually find that more than one reader has the same questions, but may be a bit too timid to ask them. “There’s no such thing as a poor question” as my mentor used to tell me.
Marty