Have you ever wondered why, despite following the same finishing procedures, one spray application comes out perfect…but the very next day the same procedure turns into a dogfight? Here’s a pro finishing tip: It could be the weather causing the problem.
You see, most coatings perform predictably within a certain temperature/humidity range, but if you move outside this range you can find yourself falling down the spray finishing rabbit hole of confusion. Even after years of professional finishing I can still get blind-sided by ambient conditions in my shop. So, I’m planning my adjustments for spring and summer weather conditions, which are coming up fast.
Here is my 3-pronged approach for mitigating in-shop climate swings, and I’d love to hear yours, too.
We obviously can’t adjust the outside weather, but we can adjust (1) our workshop climate, (2) the way we apply the coating, and (3) the coating itself.
Let’s take them one by one.
- Adjust the Workshop Climate
Ideally, this is where you’d start, because if you take care of this one, you don’t need to bother with #2 or #3.
If you have a lot of control over your work-space, adjusting it to the coating’s ideal climate range isn’t complicated.
There are all sorts of portable heaters, coolers, humidifiers and de-humidifiers that can support (or stand in for) a HVAC system. Also, keeping the surface you are finishing free of seasonal dust, pollen and other ambient pollutants is critical. A well prepared surface is a real problem solver.
Pro tip: The first 20-30 minutes after applying a coating is the most important because that’s when the coating levels, de-airs, and starts to shrink.
If you can control your work-space climate during this critical window, it might be all you need to get great results. If 20-30 minutes still presents a challenge, move on to option #2 below.
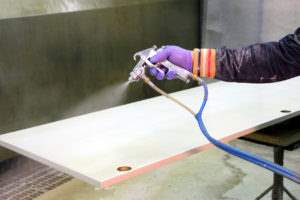
- Adjust the Application Process
There are too many types of spray guns and apparatuses to give you any kind of reliable “rule of thumb,” but know this:
Pro tip: You can often mitigate weather/humidity swings by adjusting your atomization pressure, fluid pressure, and/or your tip set up or down one size. Also, keep the wet film thickness of each coat within the specified range suggested by the coatings manufacturer. Too heavy of a wet coat in cold/humid conditions will take too long to dry – so keep those wet coats on the thin side of their spec. Likewise, in some cases a reduced heavy coat may be required in hot/dry conditions, so be prepared to adapt and modify.
Definitely consult your users’ manual and do some tests before you move on to your “live” work.
+1. Check your Air Supply
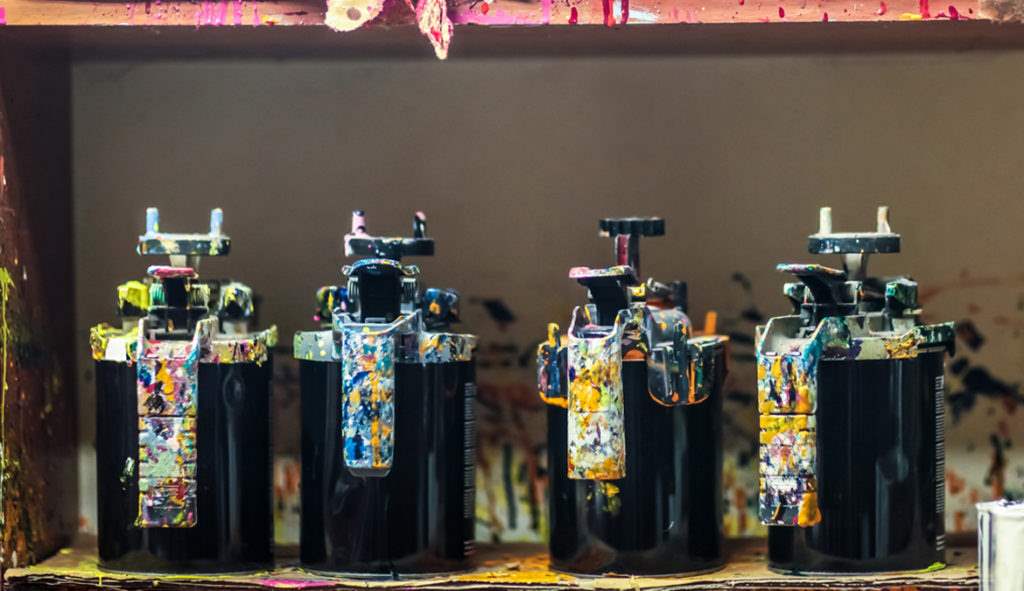
Yes – we all know, or should know, to keep our spray guns and fluid handling equipment clean and free of damage, but how many of us remember to drain the water out of our air compressor tank? When the dew point changes and humidity rises your compressor will be pulling in air that has a higher moisture content. Once the air is compressed the moisture, i.e. water, builds up inside of your air tank and will find its way into your outbound air line. To solve this problem I strongly recommend that you, 1) drain your tank on a regular schedule (purchase a automatic bleed valve that will do this for you…) and install and maintain a combination water desiccant and oil filter (if you have an oil-cooled compressor motor) that is positioned at the outbound air gauge, and also fitted to the handle of your spray gun right in front of the mini -regulator. These two filters will make your troubleshooting procedure shorter and will ensure that you have a clean air supply.
- Adjust the Coating
If #1 and #2 don’t work, you can also try reducing the viscosity of the coating you’re using.
For example, if you’re in a particularly hot/dry climate, you can “thin” a water-based coating by adding basic tap water to it.
Pro Tip: For our customers using EMTECH Series water-based finishes, I recommend using our SA5 Universal Retarder (start with 5% by liquid volume for spray applications; an additional 10%-20% for brushing/wiping).
These are just a few of the seasonal procedures you should take into consideration as your finishing schedule moves forward. Keep good maintenance records, observe your ambient environment and establish a good working relationship with your coatings supplier.
Have you had any “climate clashes” in your shop, and if so, how did you fix them? Please share your thoughts or see what others are saying in the comments section below.

Great information, thank-you!
Thank you, Brian.
How do you measure the wet coating thickness? I have a pretty good feel by eye and the reflection of the coating for how wet I want it, but have no idea how thick it actually is while wet.
Mike,
You can use a credit-card style wet film gauge, which can be purchased at most well stocked paint stores.
-JW-
thanks jeff,, could a finish room at 75 to 80 degrees with a un-thinned coat be drying to fast and causing orange peel? em9300 1.5 nozzel setup hvlp gun. also can the em9300 be sprayed over epoxy filled crevice’s in a live edge top
Larry,
Orange peel is often caused by over-atomization of the coating as it exits the fluid nozzle. In this case you should lower the atomization pressure or move up one size in tip size. The temperature range of 75-80F is perfect, but if you are running too low in RH (humidity) you may want to reduce the 9300 by 5-10% with SA5 Retarder.
-JW-
Hey Jeff,
Here’s my take on controlling the various climate issues, especially in NH where this winter weather has been challenging to say the least. One of the problems with spraying in a small shop with a fresh air intake air source is the heat in shop is sucked out in a hurry. So to mitigate this, I have purchased a 3′ medium wave IR lamp with low CFM fans attached that not only keeps the sprayed surface warm, but helps dry the finish in 15-20 minutes. No matter what the temp or humidity is, I have control over how the finish dries. Been doing this for years and it has allowed me to cut the finish time in half.
Chris,
Thank you for sharing this information with us. Can you send us an image of this set up?
-JW-
http://infratech-usa.com/automotive/products/waterborne-systems
This is the system. unable to attach pic here.
Thank you, Chris. I am familiar with this company and their products. You made a good choice.
-JW-
Likewise here in Wyoming, Chris. With the added difficulties of very dry air (10% RH summer and winter) and 7500′ elevation (low atmospheric pressure = fast-evolving solvents). Allowing for the dozen or so interdependent variables that go with spray finishing, what has provided reliable outcomes for our low-powered turbine system is: warm finish, medium-warm workpiece, cool room.
Warm(ed) coating we achieve by leaving the gallons and gun in the house, nearer the woodstove, or in a sunny window area prior to spraying; with some soupy pigmented WB acrylics, I might even dunk the gun in a saucepan of warm (85F) water. This lowers viscosity & encourages flowout w/out the troubles that come from adding reducers (solvent pop, very slow cure).
Workpieces at room temperature (70-75F) can be hardest to achieve. Takes awhile to bring a panel of 3/4″ MDF or assembled hickory door up from overnight temperatures to a nice medium warm, and that can lead to bottlenecks. But a workpiece that is too cold or too hot will cause all kinds of grief.
Our small finishing room gets very cold at night. But it is small, only 6×12′, so it doesn’t take long to bring up to spraying temperature. I’ll often overdrive it first thing in the AM, or between batches of parts on very cold days: heat the air up to 80-90F with a direct vent propane wall heater plus our little oil-filled radiant space heater. then as the walls and floor warm, let the air temp fall to around 60-65F. These cool ambient temps help reduce orangepeel from fast surface flashoff in our dry, thin air. The warmed finish and workpieces keep between-coat dry times within reason, and once safe to handle, the parts are moved out of the finish room and force cured in the sunshine or over by the woodstove, and the next batch goes in.:)
I have used many waterbased products over the past 20 years and seen the state-of-the-art in WB coatings change drastically thru three or four generations. Manufacturers have come and gone. But since the days of Oxford Hybrid, I have found Target Coatings products to be the most predictable, and the most forgiving of less-than-optimal equipment, technique, and ambient conditions. For those of us somewhat at the mercy of nature — who don’t have $100k climate-controlled spray rooms and UV dryers — EmTech products offer the best crossover point for reliable finish quality in the shop and good performance in the field.
Thank you for sharing, Bob.
-JW-
Good tips Jeff. I’ll add another to your list and it might be an appendix to your first tip related to workshop climate…and that is…proper lighting. So many folks that I teach spray finishing techniques overlook proper lighting as part of the spraying/finishing environment. I always use a combination of indirect and direct lighting so I can constantly monitor and adjust each of the variables. Hope this helps…
Jeff Sobeck
Jeff,
Yes, this is very helpful information! I agree with you — lighting is critical in determining what direction your finishing process is going in.
Thank you for sharing.
-JW-
It usually only gets down into the 50’s in the winter where I am so I use a large canopy with a small propane heater inside. I can get it up around 70 degrees in there for drying parts. Door racks are moved in and out of there. We use a small fan for airflow to speed things up.
In the summer it’s in the 90’s so we simply go heavier with all the coatings.
Thank you, Jeff. You are in the SW and your advise is helpful.
-JW-
Hi Jeff – Great collection of tips and feedback replies. The tip regarding orange peel prevention has been filed away. Remembering that our compressor is part of the finishing environment is right on. After a long day, getting down on my knees to open the compressor’s valve was often easily put off ‘till the next day. Then I modified my release valve with some 3/8” pipe and a valve I can open / close with my foot. Also, when the weather is cold, I too will use a heater in the finishing room and it seems sensible to keep my work piece in the same warmer environment.
Thank you, Paul!
-JW-