You know the drill:
You’ve invested a lot of time designing and crafting what has the makings of one of the best pieces you’ve ever made.
After finishing the entire piece, you realize all too late that some parts are lighter in color or have a different tone. Or perhaps one panel or even the entire piece didn’t take on the color or tone you’d been looking for.
Well, I have some good news for you.
There is one special effect you could use to get everything quickly back on track: wood toning.
And if you’ve read my previous article about Wood Finish Shading (its sister special effect), you’re already halfway there in understanding wood toning.
Let’s get to it…
PREPARING YOUR TONING FINISH & READY YOUR SPRAY FINISHING EQUIPMENT
Because both shading and toning follow the same finish and equipment preparation procedures, if you haven’t yet done so, I’d encourage you to read about them in my two-part Shading article.
Click on this link and scroll down to “Prepare Your Shading Finish.”
Once you’ve got that down pat, click on this second link and scroll down to “Preparing Your Spray Finishing Equipment. ”
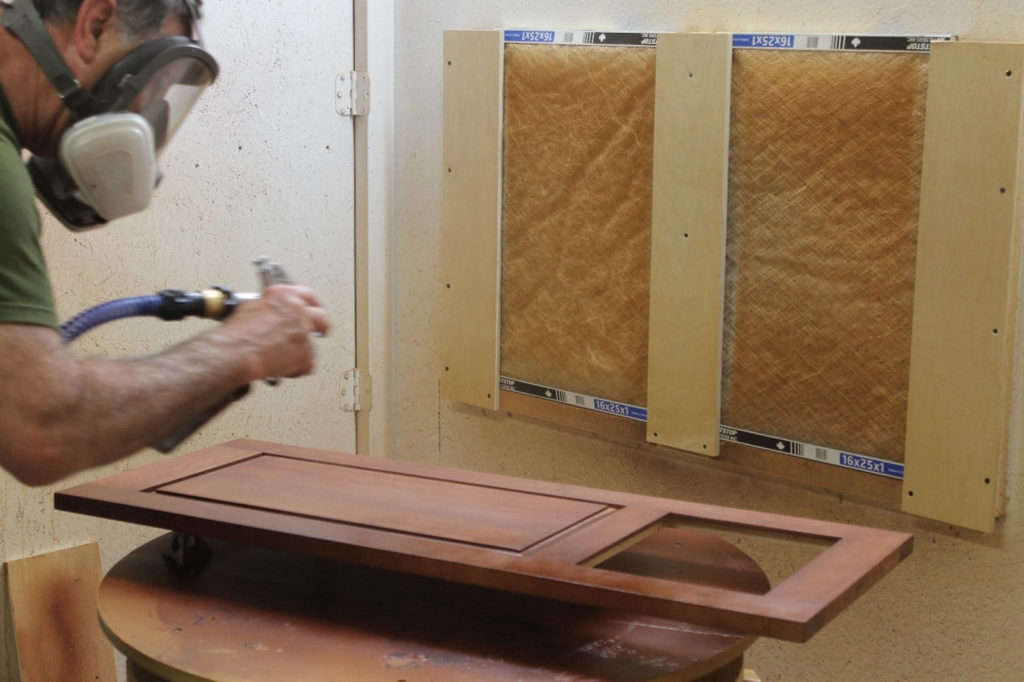
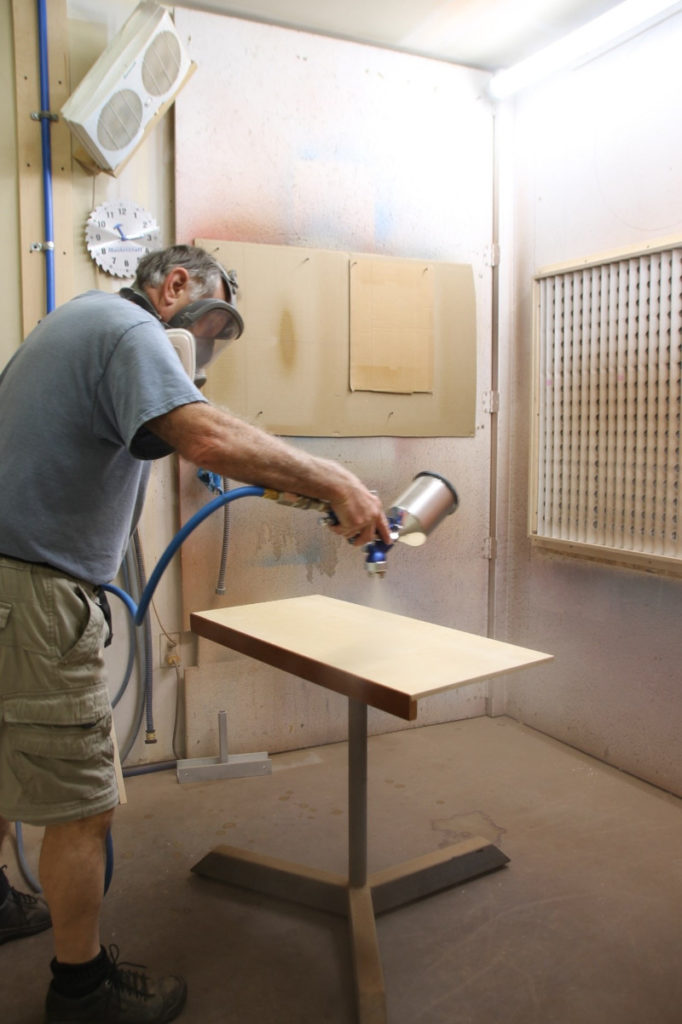
SPRAY APPLICATION TECHNIQUE
With the water based finish prepared and finishing equipment ready to go, let’s look at application technique.
The first step is to get rid of any surface oils or contaminants by doing a quick wipe down with a shop cloth dampened with a 50/50 mix of denatured alcohol and tap water.
Next, pull out the sample board to guide you along in achieving the color, tone and look you’re after.
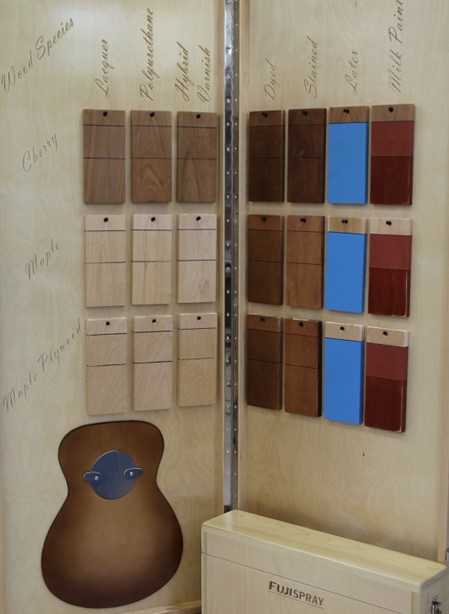
Pro Tip: A sample board is a piece of wood of the same species as your project, which has been sequentially finished to showcase how it should look after each step, from bare wood, through to the topcoat. With your sample board in hand, you can see immediately how your finishing is coming along.
THREE COMMON WOOD TONING JOBS
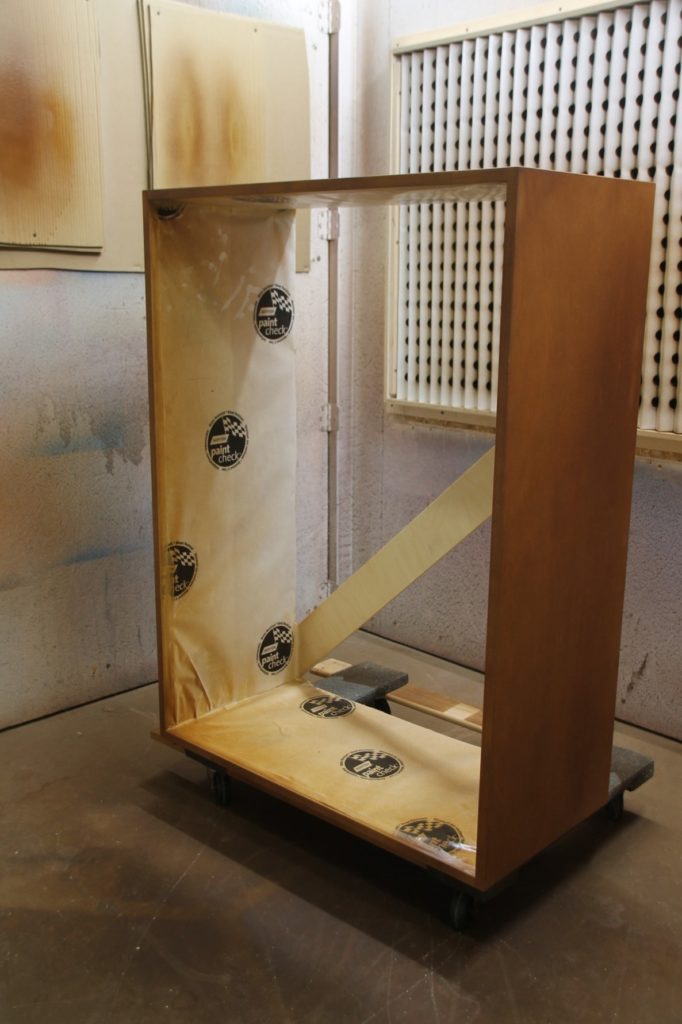
Toning the Entire Piece. It’s not unusual when doing one-off (AKA bespoke) pieces or when duplicating an existing piece, to find that things didn’t quite come out as you (or your client) had envisioned.
Because “time is money,” it’s most often easier and quicker to tone the piece rather than strip the finish and start afresh.
Beginning in the least conspicuous area and working your way over the entire piece one section at a time, spray light coats until you’ve achieved the look you’re after.
Just be careful not to go overboard and make the piece too dark – and remember that the final topcoat may alter even the color or tone.
This is an example of where a sample board is invaluable as a means of checking progress. And if you have more than one piece to tone, as you complete one, use your first finished piece as a template for the others.
Refinish a Solid Wood Frame Veneered Panel. It never ceases to amaze me how often veneered sections of a piece come out looking quite different from the solid wood parts.
This is especially obvious with framed doors or panels, as the veneered sections usually come out quite a bit lighter.
Ensure to use high quality masking tape and paper (I get mine from an auto parts supply store) to cover areas you don’t want to change.
Pro Tip: When applying masking tape, ensure to go over the edges of the tape a second time with your fingers or a blunt wooden dowel to ensure the tape edge is firmly bonded. And remove the tape only once the toning finish has had a few minutes to set up.
Blend in a Section of Sapwood. Because of the high cost of lumber nowadays, it’s increasingly common to see sapwood used in panel glue-ups.
Of course, depending on the taste and effect you or your client is after, such “less desirable” pieces may actually be highly desirable.
However, when a more uniform appearance is needed, toning is one of the most effective ways to go.
I like to mask off the section requiring attention and apply light coats until l’m, “just about there.” I’ll then remove the masking tape and apply another coat or two, which allows me to blend in the two dissimilar areas.
TOPCOAT FOR PROTECTION
Once you’re happy with your toning effect, apply the water based topcoat of your choice, such as Emtech EM6000 Production Lacquer to lock everything in and protect your piece.
This will even be necessary if you’d used topcoat as your carrier, and for the simple reason that if the surface is scratched the damage could go into and beyond the colorant level.
Again, remember to pick a topcoat that is fully compatible with the toning finish you’ve so painstakingly applied.
Summary
Wood toning, like its sister effect, shading, is a great finishing technique which I’d recommend you add to your finishing lexicon.
And as always, let me know in the comments if you have any questions about toning or there are any other topics you’d like to see in future articles. I’m here for you!