In Part 1 of this post, we covered what wood finish shading is, why you would want to use it, how to prepare your surface, and how to prepare your finish. If you missed it, you can find it here.
Today, we’ll cover the best way to prepare your spray equipment, spraying technique, and topcoat protection.
Let’s jump right in…
PREPARING YOUR SPRAY FINISHING EQUIPMENT
This extremely low viscosity (“thin as water…”) shading finish can be applied with nearly any spray gun setup, depending on the specific effect you’re looking for.
Because I wanted a finely atomized shading effect for my sample project, I reached for my Fuji Spray Touch-Up spray gun (model 9622).
With its 1.0mm needle/nozzle/aircap set, it delivered the extremely fine atomization I was looking for.
Regardless of the spray equipment you’re using, I’d recommend you adjust your fan setting to deliver a circular, rather than an oval pattern. Doing so will make it easier to control exactly where the finish will land.
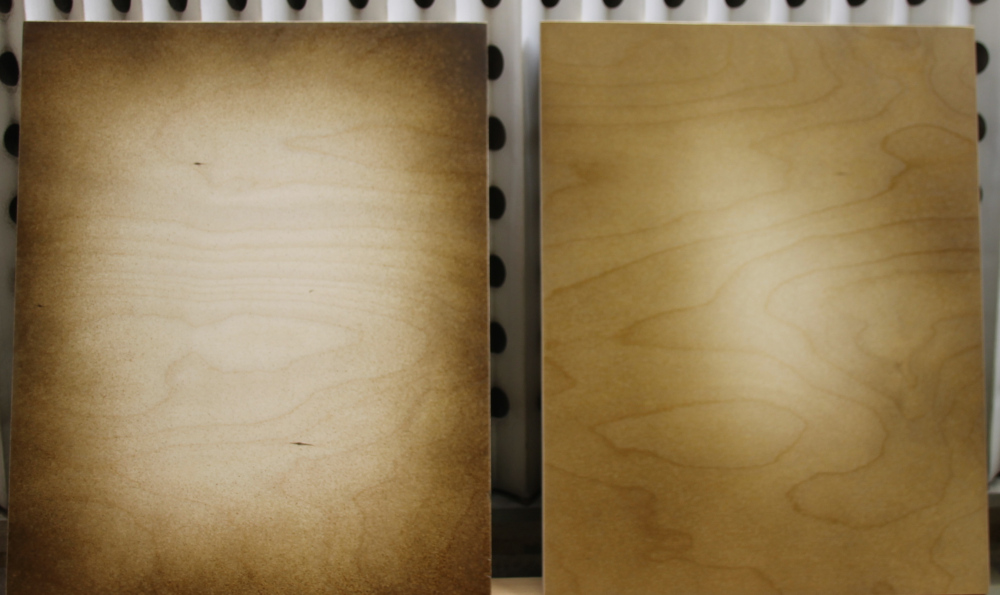
Pro Tip: If the wood finish shading effect you’re after is more like what you see on the left of this photo, go to a larger needle/nozzle/aircap set. That’ll give you more of a coarsely atomized effect than the one on the right which is the effect I prefer. To each their own!
SPRAYING TECHNIQUE
When you’re first starting out, you’ll find it easier to get the desired shading effect if you lay your piece down flat. And if your work support can rotate, that’ll make it even easier to get a more balanced looking finish everywhere.
For greater control — and especially if you want to apply more finish towards the outer edges rather than the center — aim your gun to the far side and spray away from the piece as you move along.
(If you spray from the edge nearest you and aim your gun towards the center, there’s a greater likelihood of too much finish landing on the center of the panel.)
To make all this easier to understand, check out the video below where I demonstrate the above technique…
Control the amount and intensity of finish being applied by keeping your gun hand moving at a constant speed.
Regardless of how evenly you’ve sealed the piece, understand that wood is a dynamic material, so don’t be surprised to see some areas taking on more finish than others.
So, be prepared to go back over the lighter areas to bring them up to the same intensity. And whatever you do, build the finish up slowly by applying very light coats.
Topcoat for Protection
Once you’re happy with your wood finish shading effect, you’ll need to apply the topcoat of your choice to lock everything in and protect your piece.
Just remember to pick a topcoat that is fully compatible with the shading finish you’ve so painstakingly applied.
In my case, I opted for Target Coatings EMTECH EM6000 Lacquer.
Summary
Wood finish shading is a terrific finishing technique which can add a very dramatic effect to your work.
I hope this brief introduction will encourage you try it yourself.
And let me know in the comments below if you have questions about shading — or any other topics you’d like to see in future articles. I’m here for you!