

Part 1: Why Finishing Open Grain Wood Demands More than a “More Coats” Strategy
When finishing open grain wood, here’s a trap even experienced finishers can fall into:
You’re working with a beautiful piece of figured walnut, open-grain mahogany, or a slab of quartersawn white oak.
You know the piece needs to stand up to daily use — spilled wine, cleaning agents, the occasional acetone-adjacent product on a kitchen countertop.
So, you do what any sensible finisher does: you build the film. Coat after coat, sanding in-between, chasing that bulletproof surface.
And then you look at the piece under a raking light.
The grain has gone flat. The wood that had depth and shadow and topography now looks laminated or “plastic.”
The finish hasn’t complemented the wood, it has buried it.
Worse, if the project lives in a production environment, you’ve added time, material cost, and dry/cure cycles for an aesthetic result that your client didn’t want.
This is the core tension in finishing open-grain species: the same film thickness that delivers chemical resistance can destroy the visual character that made the wood worth using in the first place.
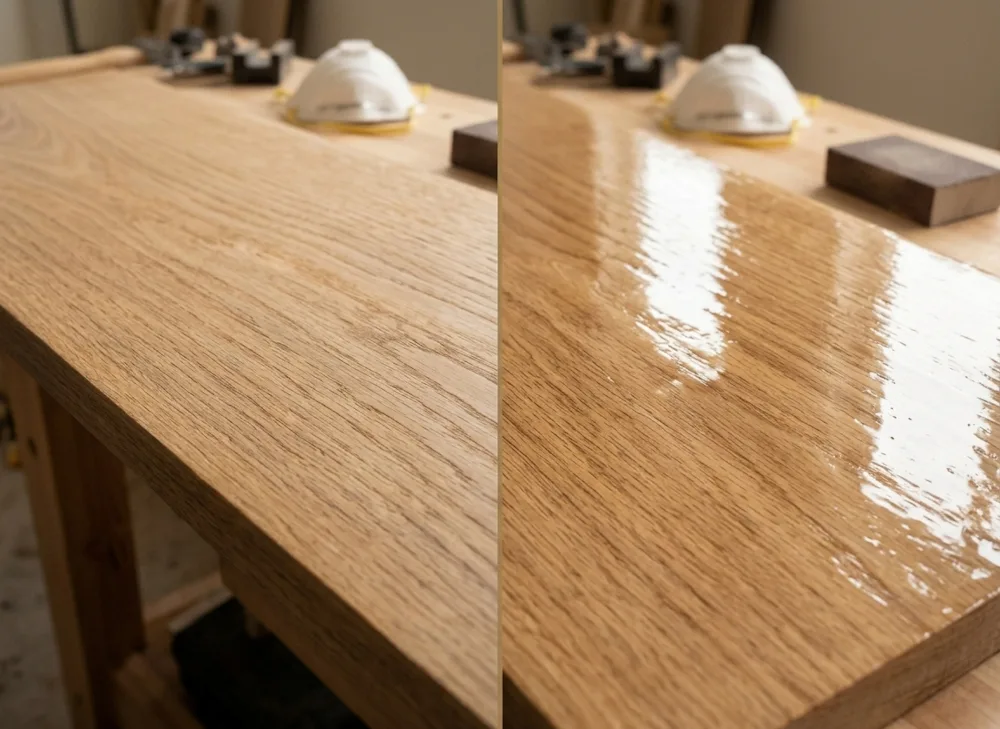
Why Finishing Open Grain Wood is Uniquely Unforgiving
Close-grained species like hard maple, cherry, and birch have tight pore structures. Film builds evenly across the surface. You can stack coats without dramatically altering the way light reads the wood.
Open-grain species such as mahogany, white oak, walnut, sapele, ash, wenge, and iroko are structurally different. Their large, open pores create a natural micro-topography across the surface.
Those valleys are what give a piece of figured wood its “pop.” Light falls into the grain and bounces back at a slightly different angle than it does from the flat field surrounding it. That contrast is what your eye reads as depth.
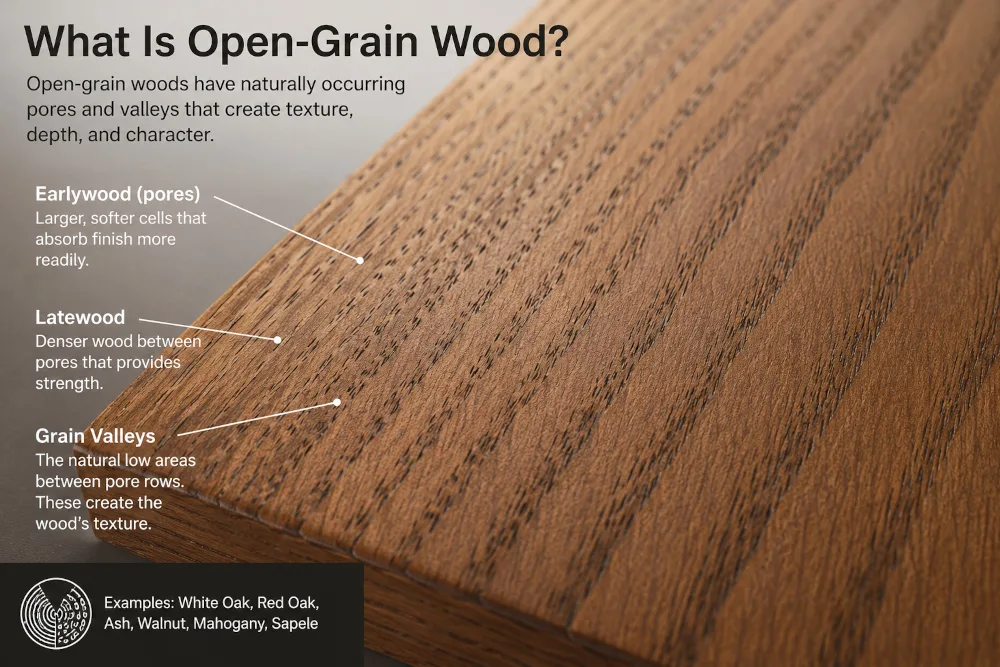
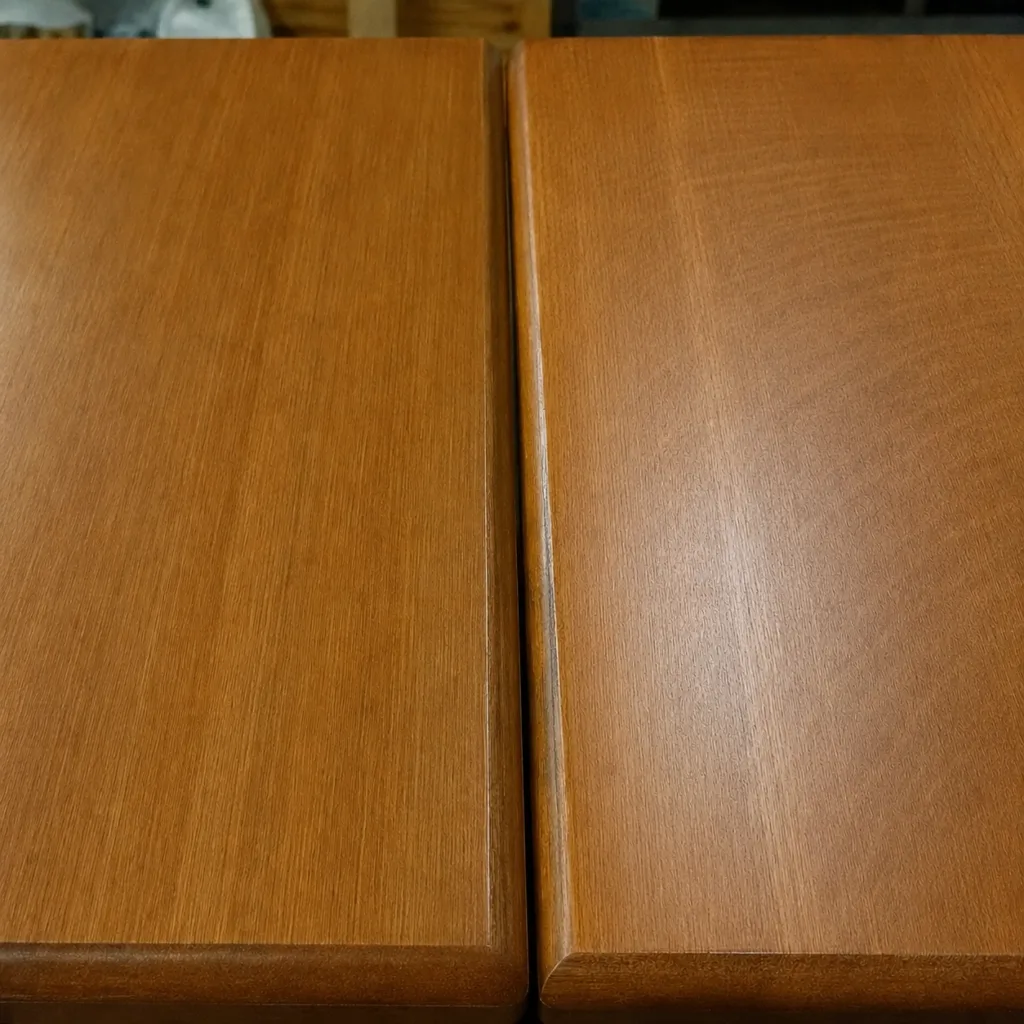
When you fill those valleys with finish (even a good, optically clear finish), you eliminate the contrast. The surface becomes uniform. The wood looks like a photograph of itself, not the real thing.
The problem compounds with darker species. Walnut, mahogany, wenge, and similar woods have pronounced contrast between the latewood (dense, dark bands) and earlywood (the lighter, more porous tissue).
The Chemical Resistance Problem
Here’s where finishers understandably reach for more film, because chemical resistance is often directly related to barrier integrity. A thicker, fully cured film resists spot chemicals, cleaners, and solvents better than a thin one.
That logic is sound — up to a point.
What it misses is that chemical resistance is not only a function of total film thickness. It’s a function of:
- The resin chemistry — what the finish is actually made of
- The degree of cure — whether the film has fully cross-linked
- The film’s bond to the substrate — adhesion and penetration into the wood structure itself
- Total dry film thickness — but only as one variable among several
High-quality, fully cured waterborne finishes built with chemically resistant resin systems — such as our Urethanes, Varnishes and Lacquers — can deliver excellent spot-chemical resistance at surprisingly low dry film thickness.
The performance isn’t coming from sheer mass of material. It’s coming from the quality of the cross-linked polymer network.
This is the insight that changes how you approach finishing open-grain species. You don’t need to sacrifice the grain to get a durable surface. You need to use a finish that delivers its chemical resistance through chemistry, not through volume.
What “Low-Build” Actually Means — and Doesn’t Mean
Before going further, let’s be precise about the term. “Low-build” is sometimes used as a synonym for “thin” or “diluted,” which implies weakness. That’s not what we’re talking about.
A low-build finish is one that is engineered with a high-solids content and application profile to deliver the needed performance characteristics at a lower total wet film thickness.
High solids means more of what goes on the wood stays on the wood after the water or solvent carrier flashes off.
So, you’re not spraying a diluted product and crossing your fingers. You’re applying a concentrated, engineered material in a controlled way.
The practical result: the dry film that remains after cure is thinner than what a conventional build strategy would produce, but it’s chemically equivalent or superior in terms of resistance — because the resin itself is doing the work.
For open-grain species, this approach allows you to protect the surface without filling the grain valleys.
The “valleys” remain optically and physically present. Light still falls into them. The wood still breathes visually. And the finish still does its job.
Setting Up for the Technique
Before Part 2 gets into the specifics of application — viscosity, atomization, coat count, and the sanding strategy that ties it together — it’s worth establishing what you’re optimizing for on these species.
Your target on a piece of walnut, mahogany, or open-grain oak is a surface where:
- The finish is present everywhere. No areas of bare, unprotected wood, no pinholes or holidays in the film.
- The grain valleys are still visually open. Light reads the topography of the wood. There is depth and shadow where the grain structure dictates there should be.
- The film is chemically resistant and durable. The surface stands up to the use case the piece was designed for — whether that’s a kitchen cabinet, a conference table, or a custom humidor.
- The sheen is consistent across the surface. Even on a satin or matte finish, the sheen level reads uniformly across grain and field alike.
Getting all four of those outcomes simultaneously is the art of low-build finishing on open-grain species. Part 2 breaks down exactly how to do it.
Part 2: The Technique — Viscosity, Atomization, and the Coat-Count Strategy That Keeps the Grain Open
In Part 1, we established the core problem: building film thickness to chase chemical resistance on open-grain species often produces a plastic-looking finish because there’s a uniform film sitting over, rather than in, the wood.
The solution is a high-solids, thin-film approach that delivers chemical resistance through resin chemistry rather than through raw film thickness.
Now let’s talk execution.
The technique here is proven, but it requires discipline. The temptation to “just put on one more coat” is real, and it’s where good intentions produce mediocre results.
The Foundation: Surface Prep Is Not Optional
Low-build finishing is unforgiving of substrate defects.
When you’re relying on thin, precise coats rather than film build to do the work, any scratches, mill marks, tearout, or sanding irregularities will read through the final surface.
There’s no “bury it in finish” rescue here.
For walnut, mahogany, and similar species, work through your grits systematically. On figured material, hand-sanding with the grain at the final grits (up to 400 if needed) is preferred.
A poorly balanced random orbital sander will leave hook-marks that may telegraph through a low-build finish in a way they never would under a heavy build.
Whichever method you use, ensure your sanding procedures are well defined and your tools are running properly.
Blow out the pores with compressed air before applying any finish, because any debris in the open grain will create a rough, inconsistent base for your first coat.
For very open-pored species like white oak or coarse-grain mahogany, you have a choice to make before you start: are you leaving the grain fully open for a “natural” tactile surface, or are you doing a paste grain fill to achieve a smoother final surface while still keeping the optical depth?
Side Note: A common practice among professional finishers is to apply a wash-coat using a product like our EM1000 Universal Sanding Sealer before using a grain filler. For grain filling, our HSF5000 Primer / Surfacer / Filler is available in a Neutral Tint.
Some pros also choose to seal the wood again after filling. Since the best method depends entirely on your specific project, we’ll explore this debated topic in a future article.
Most importantly, what you’re not doing is using your topcoats as a grain filler. That’s the strategy we’re moving away from.
Spraying: HVLP Setup for Thin-Film Application
For spraying, the single most important variable in low-build technique is atomization.
You want the finish well atomized, and the fluid volume balanced on the lean side so that it lands on the surface as a thin, uniform wet film — keep your wet film thickness at 2mil.
Viscosity: This is where finishers often go wrong. High-solids waterborne finishes generally have higher viscosity than solvent-based products at comparable solids content.
Resist the urge to thin aggressively to get the gun to spray comfortably. Overthinning a high-solids finish defeats the purpose because you’re reducing the solids-to-carrier ratio, which means more of what you spray flashes off and less stays as a film. It also increases the risk of raising the grain and extending flash times.
If the product you’re using requires reduction to spray properly through your specific equipment, reduce conservatively — typically no more than 10% with distilled water, unless the manufacturer’s technical data sheet specifies otherwise. Then adjust your setup rather than adding more water.
Gun setup: For HVLP, a 1.3 – 1.4mm fluid tip is appropriate for most waterborne topcoats at working viscosity. Turbine or compressor HVLP both work; what matters is that you’re achieving fine atomization without excessive air pressure that bounces material off the surface. A good HVLP pattern should look consistent and dry at the edges — not wet, not dusty.
By the way, there are times when you may want to experiment with the air cap size to dial-in your atomization.
Coat weight: This is the discipline piece. On open-grain species, your target per coat is a thin, even wet film. You’re simply “tacking off the surface,” not flooding it.
The goal is to apply enough material to wet it uniformly and allow proper flow-out without pooling into the grain valleys. In practice, this often feels like you’re not putting enough on. That feeling is correct.
Flash time: Between coats, give the material the full flash time it needs. Waterborne finishes release their water carrier as they cure, so if you apply a second coat over a first that hasn’t flashed properly, you trap moisture in the film.
On open-grain species, this is particularly problematic because the pores can retain moisture longer than the flat-field surface suggests.
When in doubt, allow more time. Then, touch the surface lightly in an inconspicuous area; it should feel dry to the touch and not tacky before the next coat goes on.
Brushing or Rolling: The Technique That Makes or Breaks Thin-Film Application
Brushing and rolling a low-build finish on open-grain species is achievable, but it requires a more deliberate technique than spraying.
The instinct to work the finish — to go back and re-stroke areas, to chase bubbles, to build material — is the enemy of both methods.
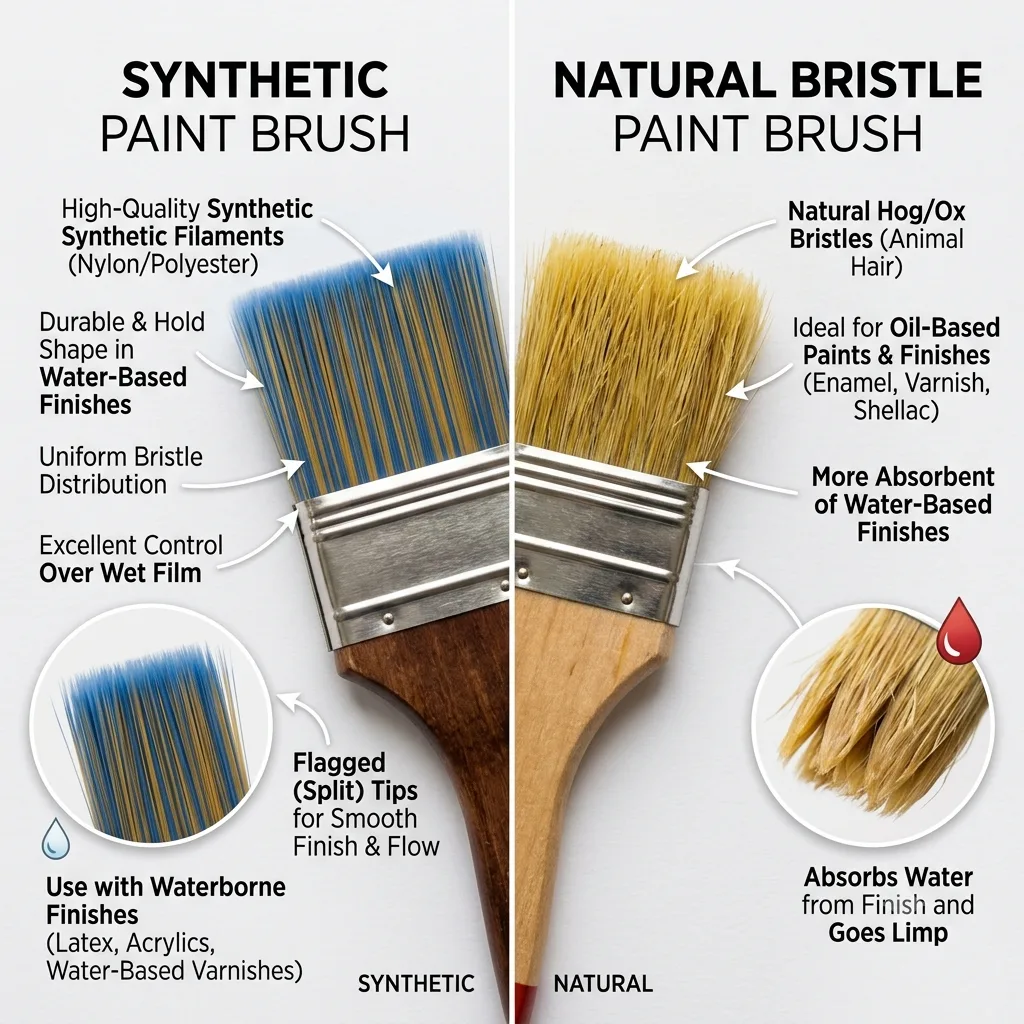
Brushing: Use a high-quality synthetic brush appropriate for waterborne finishes. Natural bristle brushes absorb water from the finish and go limp. A good quality, flagged synthetic tip gives you control over the wet film without introducing excessive air into the material.
Load and lay: Load the brush fully, then lay the finish on with long, even strokes with the grain. One stroke per pass. Do not go back.
Waterborne finishes have shorter open times than solvent-based products, and going back into material that has started to set creates drag marks and surface texture that will read through subsequent coats.
On open-grain species specifically, avoid scrubbing the brush back and forth across the grain. This pushes material into the pores and creates inconsistent film thickness across the surface — thick in the pores, thin on the field, which is precisely the opposite of what low-build technique requires.
Rolling: A short-nap roller (1/4″ or 3/16″ foam or microfiber) is a legitimate tool for flat panels and large horizontal surfaces such as cabinet doors, tabletops, and drawer fronts laid flat.
Rolling deposits a very consistent wet film thickness across the field, which is exactly what low-build technique calls for. It’s faster than brushing on wide panels and less fatiguing over a full production run.
The critical caveat for open-grain species: foam rollers can introduce micro-bubbles into the wet film, and those bubbles have a tendency to settle into and pop in the open pores before the finish levels, leaving pinholes or small craters.
To minimize this, use a high-density foam roller rather than a standard open-cell foam; keep your rolling pressure light and consistent; and always tip off with a dry brush after rolling to eliminate roller stipple, surface bubbles and get the professional look we all want.
Overlap: Whether brushing or rolling, work in manageable sections and maintain a wet edge. The overlap between passes should be minimal; just enough to blend the edge without doubling the film thickness.
Coat weight: Same principle as spraying. Thin, even coats. You’re not filling anything. You’re building a uniform film across the entire surface.
The “Between Coats” Sanding Strategy
Sanding between coats on open-grain species with a low-build strategy is not about knocking down film build the way it would be in a conventional heavy-build approach. It’s about two specific things: adhesion preparation for the next coat, and removal of any raised grain or surface nibs.
After the sealer / first coat, once fully dry, sand lightly with 320-grit. You are not trying to flatten the surface dramatically. You are scuffing the surface for adhesion and removing any grain raise from the first water-based coat.
On open-grain species, this sanding should be “with the grain” and by hand in areas over the pores. Using a random orbital sander at this stage can easily cut through the thin film sitting over a pore edge and create a raw spot.
Between subsequent topcoats, 400-grit by hand, with the grain, is typically sufficient. Again: you are scuffing for adhesion, not building thickness by sanding down what you’ve applied.
Coat Count: Less Is More (and How to Test for the Right Build)
The question finishers ask most often about low-build technique is how many coats are needed.
The answer depends on the product, the application method, and the use case, but as a general framework:
- Spray application: 1 sealer coat + 2 topcoats is a reasonable starting point for moderate-use applications. For higher-demand surfaces (kitchen cabinets, dining tables, bar tops), 1 sealer + 3 topcoats, applied thin, builds the necessary film integrity while maintaining the open-grain aesthetic.
- Roller / Brush application: Same coat count as spray. Technique discipline matters more than the number.
Perhaps the best test for sufficient build on open-grain species isn’t visual, it’s tactile.
Run your fingertip across the surface at a low angle. You should feel the topography of the grain as slight texture and the valleys are perceptibly present. But the surface should not feel raw, absorbent, or fragile.
The finish should have a consistent, closed feel across both the field and the grain openings, even though the grain remains visually open. That’s the signature of a correctly executed low-build finish.
What to Expect Visually
When you get this technique right on walnut, mahogany, or open-grain white oak, the result is immediately recognizable. The wood looks alive. The grain has shadow and depth.
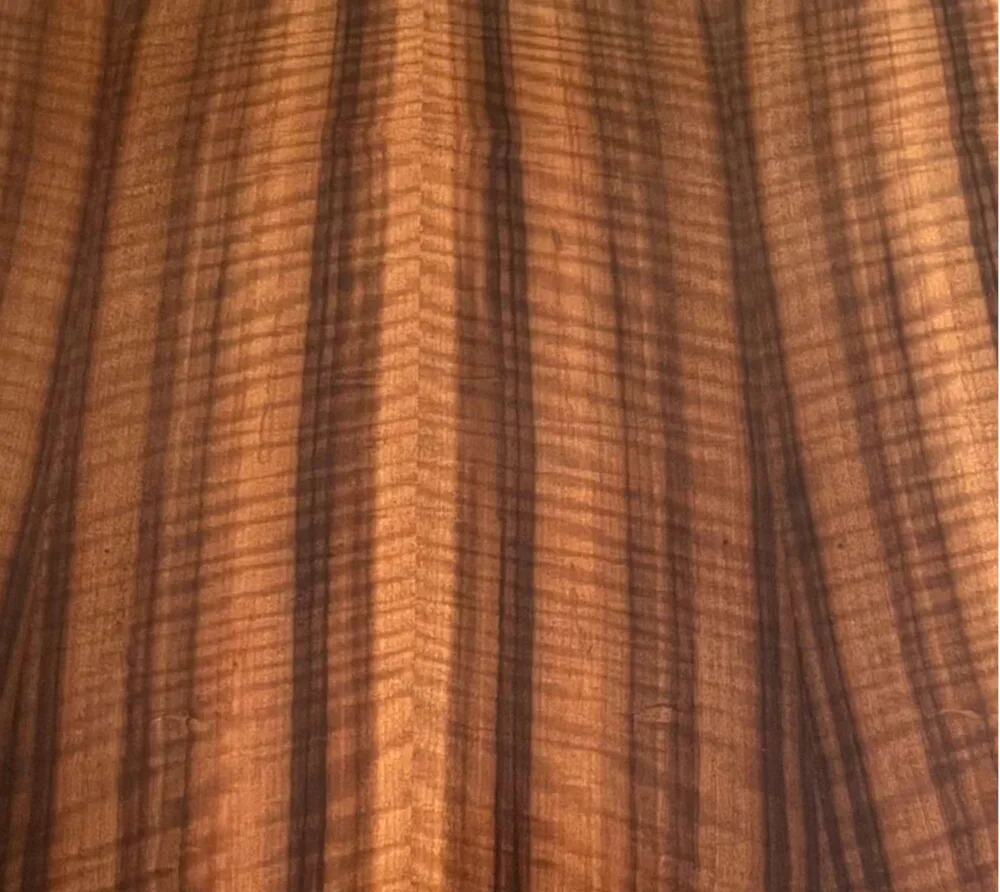
On figured material, the figure pops in a way it simply cannot under a heavy build. The sheen reads consistently across the surface because the film itself is consistent.
Remember, a high-quality, fully cured waterborne finishes built with chemically resistant resin systems — such as our Urethanes, Varnishes and Lacquers — can deliver excellent chemical resistance without high builds.
In Part 3, we’ll address the specific challenges that arise on open-grain species that also contain higher levels of oils / extractives (such as wenge and iroko) and walk through troubleshooting the most common failure modes in low-build finishing.
Part 3: Troubleshooting Stubborn Species and the Five Most Common Failures
Parts 1 and 2 of this series laid out the case for low-build finishing on open-grain species and walked through the core application techniques for spraying, brushing and rolling.
If you’ve been working through the approach on walnut or mahogany, you’ve likely had some good results, and possibly a few moments of frustration.
Part 3 is where we address the harder cases: the species where the low-build technique is still preferable, but genuinely more challenging to execute.
We’ll also cover the failure modes that show up most often so you can identify and correct them before they ruin your project.
Double Trouble: When the Wood is Open-Grain AND Oily
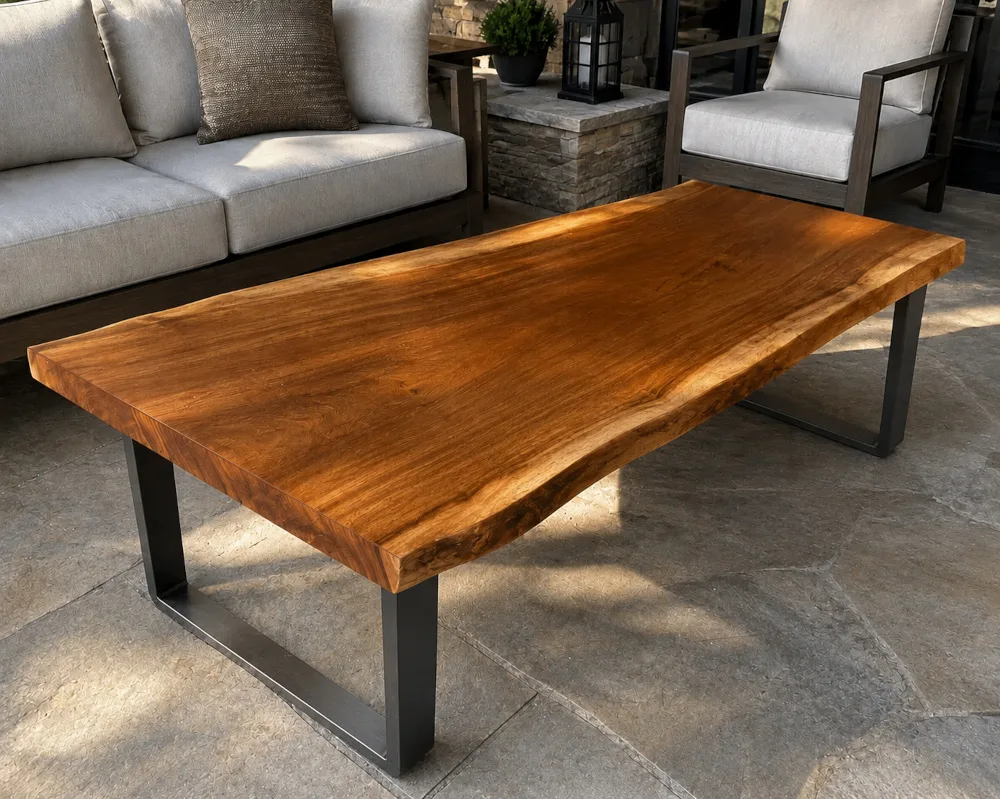
Wood species such as teak, iroko and wenge are in a category of their own among finishing challenges. Not only are they open-grain, but they also have natural oils or extractives that can create finishing problems.
“Extractives” are other natural chemicals such as phenols, quinones, and pigments. They’re not oily resins, but they similarly migrate to the surface during and after machining and create a film on the wood surface that can prevent proper adhesion of waterborne finishes, which rely on mechanical and chemical bonding.
For example, if you apply a waterborne finish directly to freshly machined wenge without addressing the surface extractives, you’ll likely experience adhesion failure.
The finish either beads during application, pulls back from the surface as it levels, or fails to bond properly and lifts under light abrasion after cure.
The old way to mitigate this was to engage in a time- and labor-intensive repetitive preparation cycle of sanding and wiping with acetone or naphtha, which also introduced a host of health and safety risks.
Thankfully, there is a newer, safer and faster way to prep and seal oily woods.
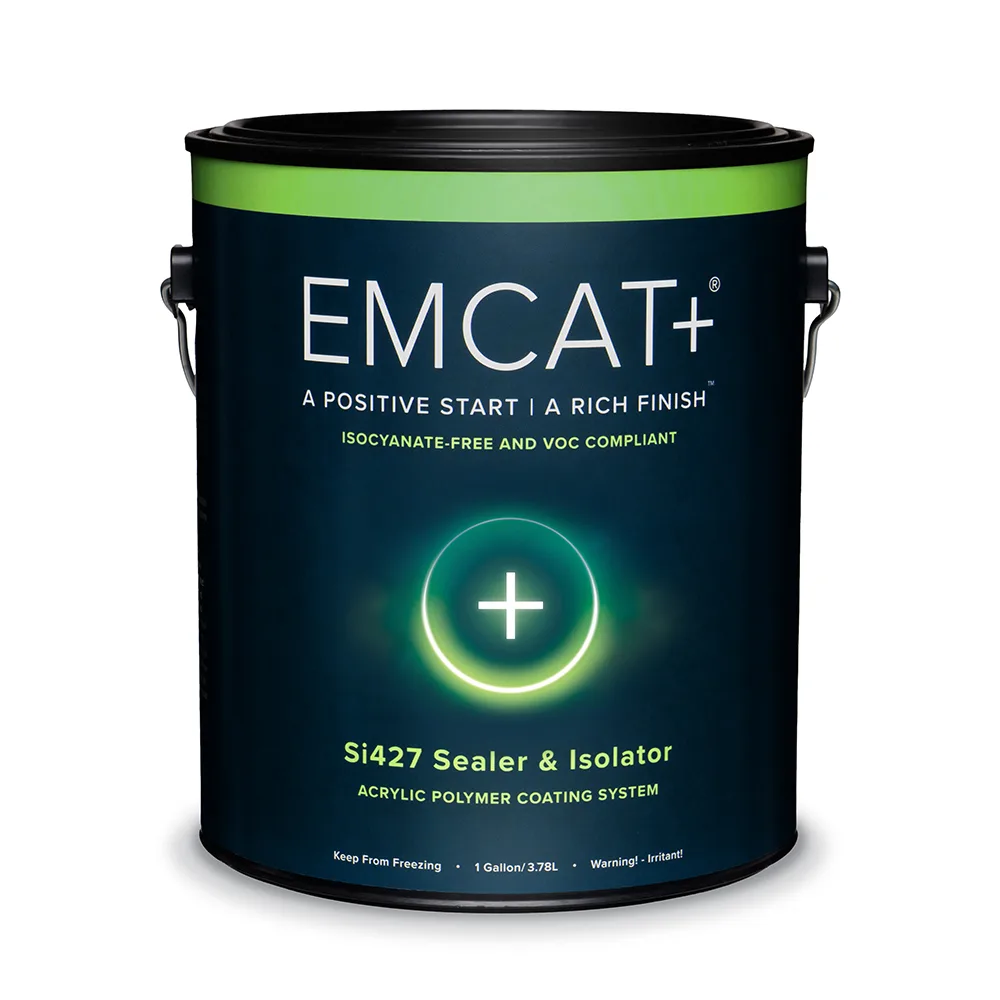
In late 2024, we introduced EMCAT+ Si427 Sealer / Isolator, a water-based, self-leveling sealer and barrier coat designed specifically for use on difficult-to-cover substrates like oily woods and previously-applied coatings.
To learn more about it and how to handle all exotic species (open- and closed-grain) read our deep dive on finishing oily woods.
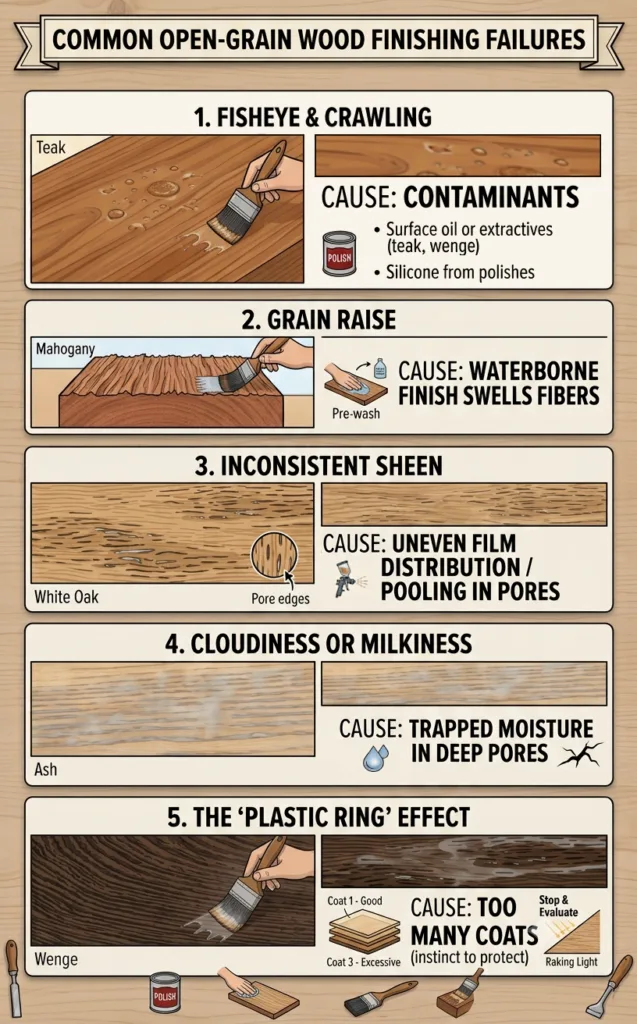
Troubleshooting Open-Grain Finishing: The Five Most Common Low-Build Failures
Even experienced finishers occasionally run into problems when working with low-build systems on open-grain wood. The good news is that most issues have identifiable causes and straightforward solutions once you know what to look for.
Here are the five issues finishers encounter most often, and how to fix them:
1. Fisheye and crawling
The formation of small craters or crawling in the wet finish film on open-grain species is almost always a contamination or adhesion issue rather than a technique issue.
On species like teak, rosewood, or wenge, it’s usually surface oil or extractives. On other species, it’s typically silicone contamination (from furniture polishes, mold release agents, or other shop products) or a residue from the sanding process.
Resolution: identify and remove the contaminant before reapplying. Fisheye eliminator additives exist but they treat the symptom, not the cause. On a production piece, finding the contamination source is worth the time.
2. Grain raise on the first coat
Waterborne finishes raise the grain of the wood on the first coat. This is predictable and manageable, but on open-grain species it can be more pronounced than finishers expect, particularly on species with significant topographic variation between the pore openings and the surrounding field.
The best approach is a light water wash before the first finish coat: dampen the surface lightly with distilled water, allow it to dry completely, then sand with 180- or 220-grit to knock down the raised grain fibers before applying your sealer.
This pre-raises the grain so the first finish coat raises it less dramatically, making the sanding-between-coats step more predictable.
3. Inconsistent sheen across grain and field
On open-grain species with a low-build finish, sheen inconsistency is one of the most common problems.
It typically presents like this: the flat field of the wood looks correct at the specified sheen level, but the grain openings (the pore areas) look either darker/glossier or lighter/matter than the surrounding surface.
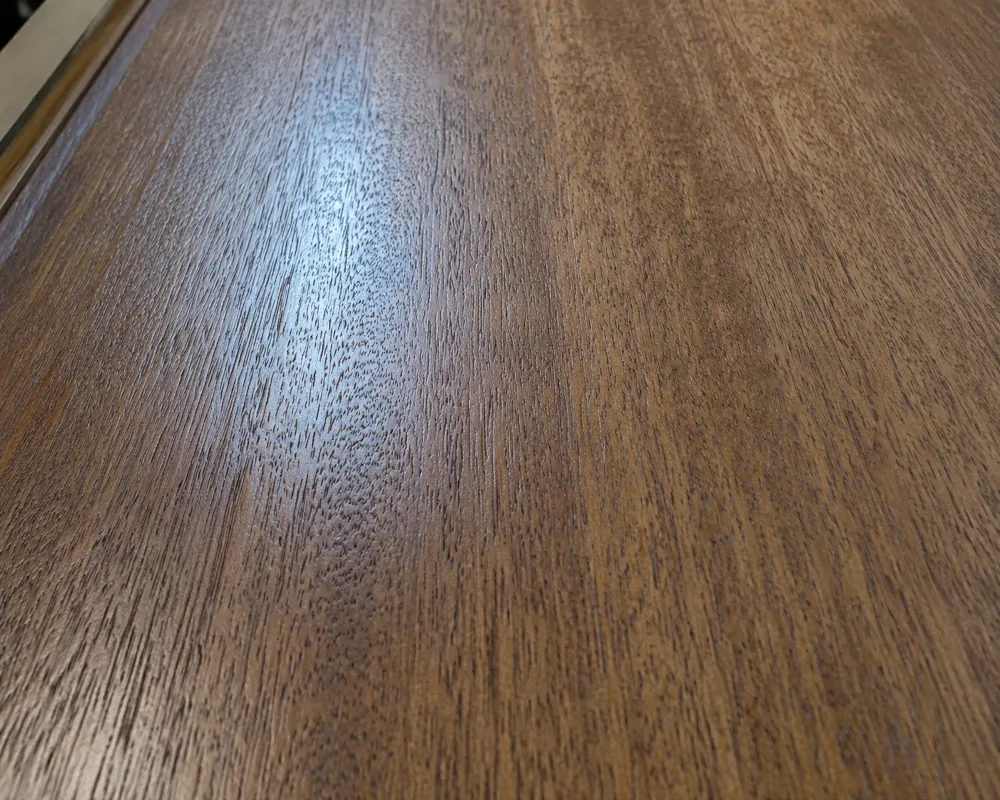
This inconsistency is usually caused by uneven film distribution — more material sitting in the grain valleys than on the field, or conversely, not enough material in the pore openings.
It can also indicate that the final topcoat was applied too heavily, allowing material to pool differentially in the pores before it leveled and cured.
Resolution: evaluate whether the inconsistency is in the finish application or in the substrate.
If it’s application, a very light 400-grit scuff (by hand, with the grain) on the affected areas followed by a properly thinned and applied topcoat will usually resolve it.
If it’s a substrate issue (you’re seeing the pore edges as slightly raw or unsealed), you may need an additional thinned sealer coat targeted at those areas before the final topcoat.
4. Cloudiness or milkiness in the grain openings
Waterborne finishes can appear cloudy or milky in areas where moisture has been trapped during cure. This shows up most often in the deep pore openings of very open-grain species like ash or large-pored mahogany.
It can also indicate that the finish was applied in conditions of high humidity or cool temperatures that extended the dry time and caused moisture to be trapped in the film.
Prevention is the first line of defense: apply waterborne finishes in conditions above 65°F and below 75% relative humidity when possible and ensure full flash time between coats.
In the grain openings specifically, avoid applying coats so thin that the material is barely wetting the surface because you need enough material in each coat to form a continuous film that can coalesce and cure properly.
If you see cloudiness after full cure, it generally indicates a compromised film that will not resolve on its own. The affected area needs to be sanded back and refinished under appropriate conditions.
5. The “plastic ring” effect on figured wood
Highly figured material can present a specific challenge when using the low-build technique. It looks like a failure but is actually a success problem.
The figure looks so good under the first sealer coat that the temptation to add more coats to “protect” the look ends up burying it.
The rule on figured material is to stop sooner than instinct tells you to.
If the sealer coat and one topcoat are producing the visual result you want (depth, clarity, live figure), adding more coats will not improve it. It will only reduce the contrast by filling the topographic variation that creates the figure’s pop.
Evaluate the piece under raking light before each subsequent coat and ask honestly whether another coat is improving the result.
Final Thoughts on the Low-Build Approach to Finishing Open-Grain Wood
The finishers who achieve the best results on open-grain wood share a common discipline: they trust the chemistry of the finish and apply less material than feels comfortable.
The intuition that “more is better” is deeply embedded in finishing practice, and it comes from legitimate experience with underbuilt, underperforming finishes.
But when you’re working with a high-solids, high-performance waterborne product applied correctly, the cross-linked polymer network is doing the work so the film doesn’t need mass. It needs integrity — proper adhesion, proper cure, and proper distribution across the surface.
Open-grain species reward this discipline more visibly than any other category of wood, and I hope this series helps you bring out the beauty you’re looking for.
Do you have any questions or experiences finishing open grain wood? Please share your thoughts or read what others are saying in the comments below.
Jeff Weiss is the owner and chief chemist at Target Coatings, which has been dedicated to exclusively manufacturing water-based, low-VOC and HAPs-free wood finishes for nearly 40 years. Creator of the first water-based lacquer with 100% burn-in rivaling nitrocellulose lacquer, Jeff is considered one of the “founding fathers” of water-based technology and safety for refusing to accept the “status quo” and for refusing to expose others to chemicals he wouldn’t want to be exposed to. A U.S. Air Force veteran and former volunteer EMT, Jeff has always put service and safety first. Outside of work, Jeff is an avid fly fisherman who enjoys being immersed in and inspired by Earth’s natural beauty.
Thank You for the info…always very informative and useful! I appreciate you sharing valuable info and techniques.
I’m refinishing a Walnut bookcase now. Some observations using Target products. In the past, I’ve found shellac to be the best sealer. It brings out the warmth of the wood, where 1000, when sprayed (undiluted) rarely does. Showing the client the different possibilities using the solid Walnut shelves, as long as I was brushing the 1000, and particularly reduced by 25% with distilled water, I get results that match the shellac. When spraying 1000, there’s a tendency for it to sit on the wood and not penetrate as well. Brushing 1000 on one shelf and shellac (from flakes) on another gave me indistiguishable results. If spraying the 1000, it should be reduced, from my experience. Because the Walnut on this piece is so dark, I used 9300 semi gloss. I’ve had a hard time spraying it lately. I’m getting more orange peal than I would expect. I reduced it by 15% and it isn’t perfect, but much better. I’m using a Fuji 5 stage turbine, their 75g gravity gun with a 1.4. I’ve tried different air settings, but have to have the valve open around 7/8 open. Maybe a little less. The viscocity of the 9300 out of the can is about 16 seconds using their “blue” cup. (Ford #4?) At one sealer coat and 2 coats 9300 I’m getting a good finish without “half covering ” the grain I might get with 3 or 4. This is a bookcase with drawers so not going to get a lot of hard use. These are my observations. Hope they help someone.
I am thinking of refinishing the frames, doors and drawer fronts of a 1980s “Honey Oak” kitchen.
I have a drum sander, orbital sander etc. and a Fuji Pro 4 with a top loading spray gun and a 1.3 tip. I would like to remove the finish, seal and spray them, possibly with a very slight tint such as light gray to contrast with a black Silestone countertop.
I want a high end modern look
I have used the Satin EM6000 before and was and was blown away how beautifully it leveled and looked
Any thoughts appreciated
Bob,
You can approach the color adjustment in a couple of ways after you have prepared the substrate, however, the actual wood species of the old cabinets will have to be taken into consideration before I give you more specific procedures to follow. Give use a call at 1.800.752.9922 to discuss the project in greater detail.
-JeffW-
Thanks for the info? I’ve struggled with this for years.
Hey, Jeff.
I had a friend from work who was a research chemist for west systems epoxy. At various times we talked about epoxies, and especially the blush or milkiness that you see in the coating, when you’ve got trapped water.
Her suggested solution was to go over the finish with a hairdryer or hot air gun very carefully, not enough to melt the finish, but enough so that you drive the moisture out of the finish.
Is this solution something that will also work with your waterborne products.
Thank you
Steven
Steven – No, using a hair dryer is not required when working with water-based finishes. You should allow each coat to level and form a film at ambient temperatures before subjecting the coating to an outside forced-air drying cycle.
-JeffW-
I’m building a rift-sawn white oak living room cabinet. The client want’s a dark stain on it. I’m inclined to paste fill the grain first.
Is the process with emcat any different than with other water born varnish or polyurethane? She wants it to be at the high end of water resistant. Would you recomend varnish or poly?
Jeff – Yes, the Emcat+ would be the best option for water resistance. It is OK to grain/paste fill prior to applying the Emcat+ EC2A/B top coat – no need for the Si427 if you’re grain filling. Ensure that you test and confirm that the stain, filler and the EC2A are compatible (as you would with any multi-product procedure).
-JeffW-