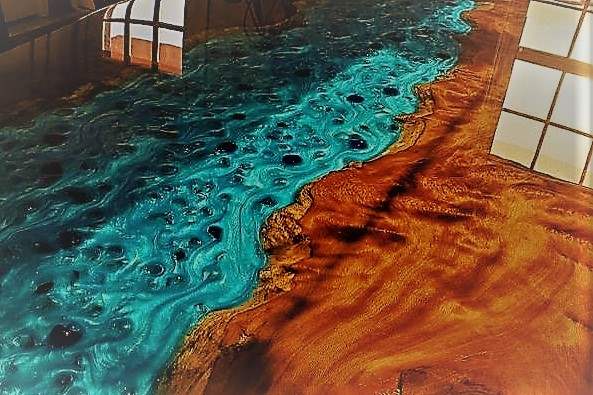
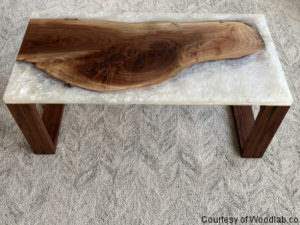
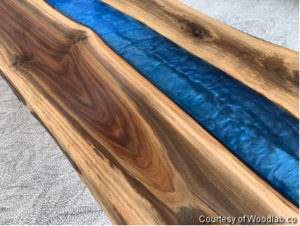
During the past two years I have seen a tidal wave of epoxy tabletop projects flood the pages of woodworking social media sites. It is a creative and beautiful artisanal tend – using live edge or reclaimed wood slabs cut into a book-match length, with voids filled with colorful epoxy resin tinted with a rainbow of metallic pigments and flakes…it is the trending bespoke finish of the 21st Century.
2-Part epoxy has been around for a long time – my own experiences with it date back to yacht interior finishes that needed a high-build look. Finishing cured epoxy was an interesting process…
Which brings me to the point – I receive lots of calls regarding the care of epoxy coated tables on a regular basis, and the primary questions center around three key issues:
How do I prevent the epoxy from yellowing over time?
What is the best way to protect the cured epoxy?
 Should I use the oil/wax method as a final finish?
Epoxy is an inert substance when cured, but it will warp, crack and color shift due to excessive thickness of the finished piece, due to live edge wood still wanting to move and weep tannin and oil, and from long term ultra-violet light exposure.
Certain epoxies have poor UV and chemical resistance and require the same type of protection your conventional base coats require. Yes, epoxy is wicked hard and offers good mar resistance, but depending on the type of epoxy you use, a clear coat of a crosslinked waterborne lacquer or urethane with strong UV blocking properties is still required to provide long-term protective qualities.
Epoxy encapsulates the wood structure into a clear, hard unified structure – one that will last for generations if well cared for. However, some epoxy resins will turn yellow when exposed to ultra-violet light and become brittle over time. Therefore, it is important that a clear coat with a high-quality UV absorber package is used to protect the resin from aging. The finishing procedure is no different than prepping and coating any other sealer or base coat. Let’s go through it by the numbers to make certain we are all on the same page:
- Carefully follow the mixing ratio instructions for the A/B resin-hardener supplied by the epoxy manufacturer. If you do not get the mix ratio correct the first time you will have a surface that is infinitely tacky or too brittle. Both issues will allow live edge panels to warp or crack the epoxy. Getting the volumetric right for the A/B resin blend, and the area volume to be encased in the epoxy, is math you need to focus on.
- Follow the cure time cycle set forth by the epoxy manufacturer. They will guide you on how long you should allow the cure time to take before moving on to surface preparation.
- If you are using an epoxy that releases an amine blush at the end of the cure cycle you will need to wash the blush off the cured resin surface before you begin level sanding. The amine is a buy-product of the curing process when the A/B resin chemistries interact – this chemical reaction leaves a greasy, slick feel on the surface, and it needs to be removed with denatured alcohol before you can proceed to any other part of the finishing process. Keep in mind that some brands/types of epoxy resins are “amine free”, but a quick cleaning should be considered and reviewed with your epoxy supplier.
- Once you are done cleaning the cured structure you can now proceed with a light fine sanding with 400-grit aluminum oxide sandpaper to create a very fine scratch pattern for our EM9300 Polycarbonate Urethane or EM7000HBL Lacquer to bight into. No, there will be no ‘burn-in” functionality between any waterborne finish and cured epoxy – a mechanical bond needs to be created to ensure proper adhesion. Using our CL100 Crosslinker to improve adhesion of the water-based topcoat is strongly suggested.
- I recommend 2-3 coats of EM7000 or EM9300 to provide good UV resistance. If the piece being finished is going to live in an exterior environment, I recommend the EM9300 Polycarbonate Urethane for this use.
- Cross link the coating of choice with CL100 Crosslinker to improve the long-term chemical and alcohol resistance of the cured finish. Let’s face it – everything is being wiped down with disinfectants on an hour basis these days and fortifying the cured lacquer or urethane will give the topcoat a long life cycle before needing to be refinished. Using the traditional oil/wax polishing methods common in epoxy glazing will not withstand the exposure to corrosive alcohol and sanitizers. Give your piece the surface protection it deserves.
Epoxy is an exciting media to work with, and I look forward to seeing more examples of it being used in unique applications. Do you have experience with (or are you considering) epoxy resin projects? Please share your thoughts or read what others are saying in the comments section below.
Very helpful article. I’m just getting started w/ spraying lacquers finishes, so forgive me if this is a dumb question, but are the Target water based finishes food safe to finish a charcuterie board made of wood and epoxy? Target water based finishes are the products I am using.
Jeff — Thank you for your inquiry. I do not recommend using film forming finishes for direct contact with food if the surface, i.e. cutting/servicing board is going to be used for cutting, chopping or dicing. Any cured film that is on the surface of the epoxy will chip and has the potential to find itself into the food prep process. If the surface is strictly for serving I suggest a light wipedown with mineral oil and a food contact grade wax.
–JW–
Jeff –
Thank you for your inquiry, and for your patience in waiting on my reply.
Using a film forming finish on cutting boards is a tricky discussion, simply due to the fact that film forming finishes can be easily damaged by sharp knife edges. Once the film is cut it has the potential to chip and peel – finding itself into the food that is being prepared on the surface. I tend to steer away from any film forming coatings on food prep surfaces and I only use mineral oil on them. Mineral Oil is easy to re-apply and is food safe.
-JW-
Insanely comprehensive :)
Thank you so much,
Now I have something to read during the holidays. This will take a while but well worth it like always
You can read another one here Besttoolsbrand
Thank you for sharing.
-JW-
Hi Jeff,
Thank you for all the great content here. I’ve explored your shading recommendations on an electric guitar body and it works perfectly! For my next project, I’m thinking of using epoxy over a very grainy burl ash then shading it with the EM6000. Any thoughts would be appreciate before I pull out the spray gun. Also, is the crosslinker a requirement when using the epoxy and EM6000? Thanks again for all of your great work here. It is much appreciated.